I flew back East for the holidays and discovered some very valuable items in my mother’s freezer: Montmorency cherries.
You see, I can’t find tart or sour cherries anywhere on the Left coast. They don’t grow ’em, they don’t sell ’em. They have sweet cherries. Lots of ’em. But no sour cherries. My grandmother used to make a sour cherry pie for dessert on Friday nights. She’d bake it in a brown glass tart pan, that now sits in my kitchen cupboard. She’d make something called a “Mazola No-Roll Pastry,” which was dead simple and always had the perfect bite to it and a smidge of salt, that was the perfect counterpoint to the sweetened sour cherry filling. I still make it and biting into that pie brings back all sorts of nostalgic memories for me.
When I lived back East, I used to buy a huge bucket of pitted cherries from the supermarket for about 20 bucks. I would drain them and measure out enough cherries for a pie, put them in a plastic freezer bag and have enough to outlast the short cherry season in Ontario. I did that this past summer, hence why there were some in my mom’s freezer.
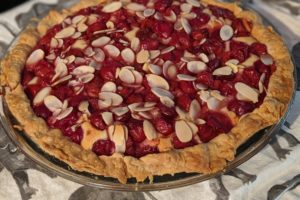
Instead of doing the traditional pie, I decided to change things up and make a batch of frangipane cream for the pie filling, and then I poured the cherries on top and finished it with slivered almonds.
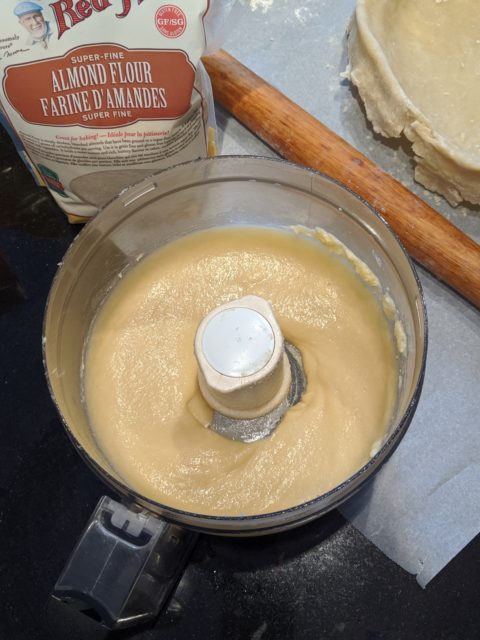
Frangipane is of French origin. It is more of a paste than a pie filling, made of almond flour, butter, sugar and eggs and a hit of almond extract. I just think of it as the filling you find in almond croissants. It’s definitely not marzipan. It was quite a popular choice on the Great British Baking Show and I was curious what all the fuss was about, so that’s why I decided to try baking with it.
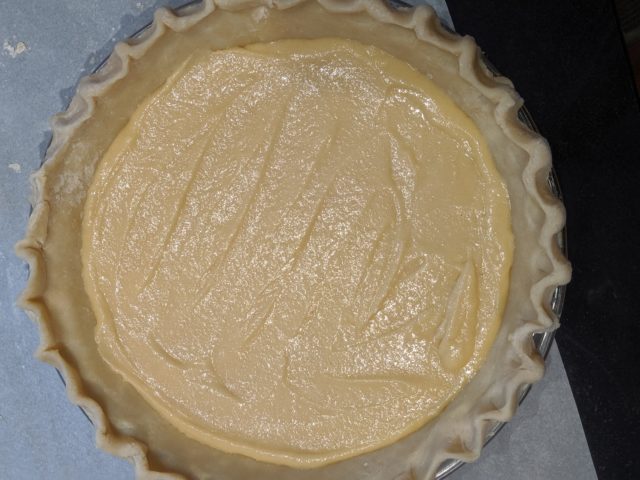
Using a food processor was the fastest way to make frangipane creamThat pie shell looked great! (before it was baked)
I don’t mind it, but I’m not sure it will become my go to filling. It has a very distinct flavour, which is not to everyone’s liking.
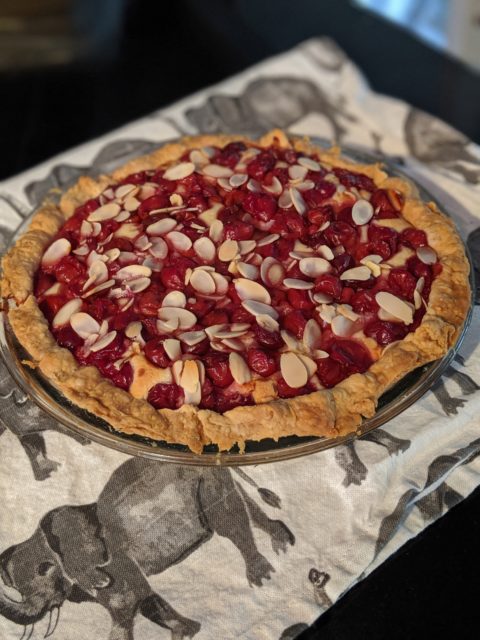
I think it baked up beautifully and looked pretty good. My only criticism (which is entirely cosmetic), is that my pie crust shrank too much and so I didn’t get the nice fluted edge I was hoping for.
Sour Cherry and Frangipane Pie
But it must have tasted good, because there wasn’t any left at the end of the evening…and people were asking for more!
Time for a break from making finnicky desserts and time for some down-to-earth comfort cookies. I fished out a recipe for these cookies that I got from my long time neighbour, Kelly. I remember she brought a freshly baked batch over to our house and they were gone in no time flat.
I can’t remember the last time I made these, probably because the kids can’t take these in their school lunches (or rather, I won’t let them–there are no laws here in California that prevent kids from bringing peanut and nut products to school, unlike in Ontario where Sabrina’s Law exists).
Some would argue these cookies bake best with processed peanut butter like Kraft or Skippy, but I only buy natural peanut butter. Just peanuts!
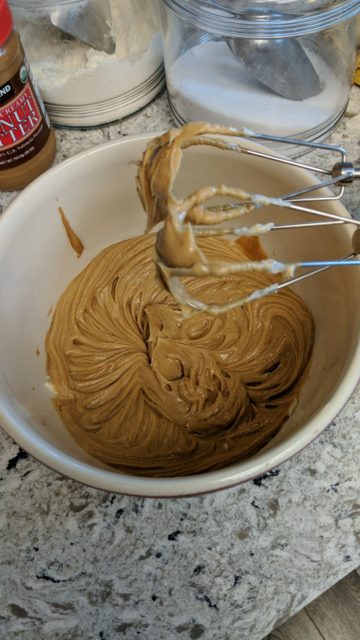
The butter mixed with the peanut butter was so creamy when I blended it together with the hand mixer.
Creamy peanut butter and unsalted butter
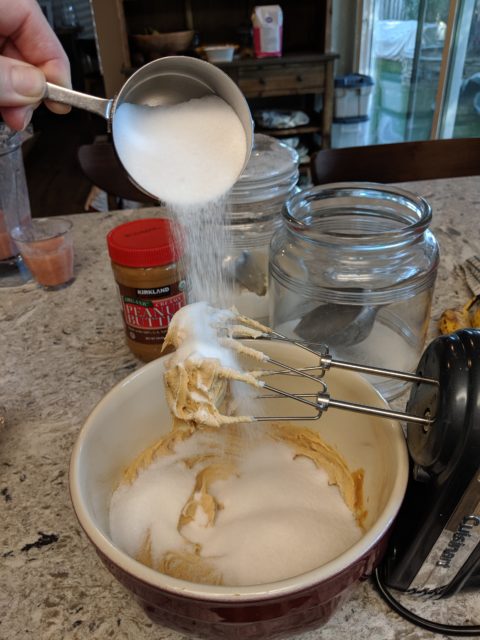
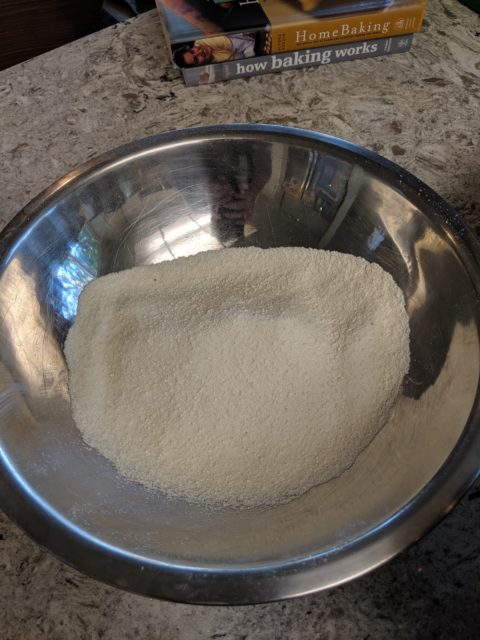
Then I added the requisite sugar, eggs and flour and voila! beautiful cookie batter.
Yes, sugar
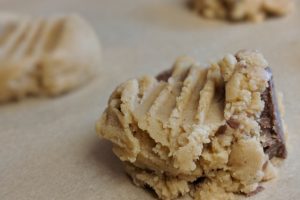
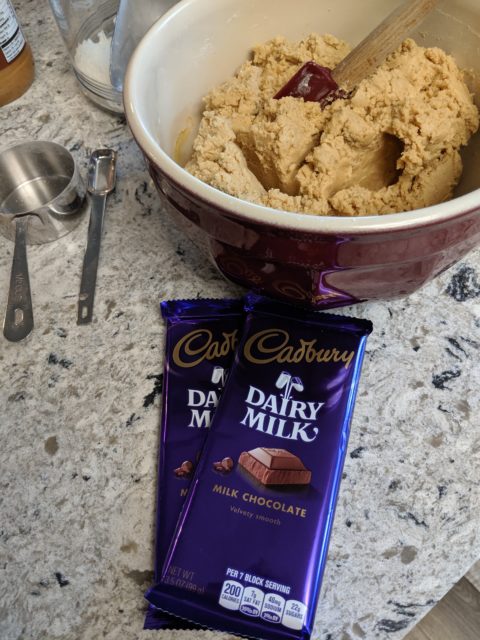
I found a couple of Dairy Milk bars in the cupboard and decided to crush them up and throw them in the batter instead of using chipits and I’m glad I did.
Chocolate + peanut butter= sheer perfection
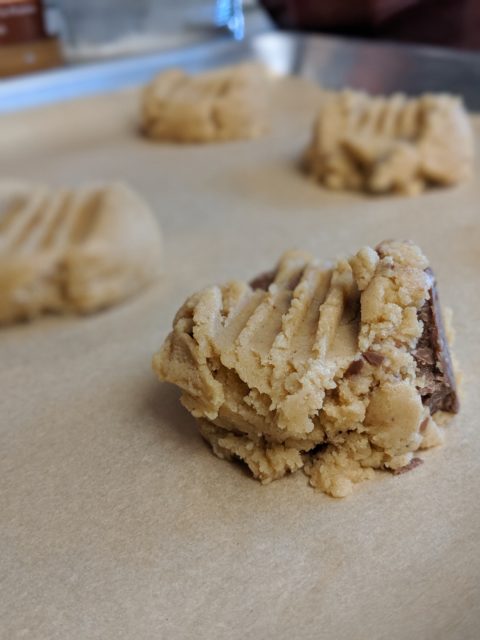
Just before baking, I used the back of a fork to press the requisite hash marks into each cookie. Because, peanut butter cookies. Right?
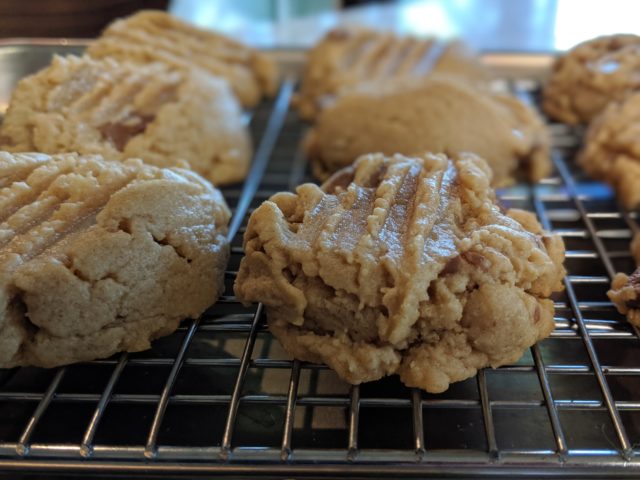
The resulting cookies were so creamy and delicious, and once again, they disappeared within a few days. I think the milk chocolate chunks also made a big difference.
These were quick and easy to make and didn’t require much, if any, skill or precision. So go make some!!!
Fork tine marks are required in peanut butter cookiesLet the cookies completely on a wire rack–if you can resist!
Kelly’s Peanut Butter Cookies
1 Cup peanut butter (I like to use all natural smooth PB)
1 Cup unsalted butter, softened
2 eggs
1 Cup granulated sugar
1/2 Cup brown sugar
1 tsp baking powder
2 1/2 Cups, all purpose flour (or you can do half whole wheat flour for a slightly denser cookie)
2 bars of your favourite chocolate bar (I used Dairy Milk), crushed up into chunks
Instructions
Preheat oven to 350 degrees
Blend peanut butter and butter together in a standing mixer or with a hand mixer until completely incorporated
Add eggs and blend followed by sugars
Add baking powder and flour(s) and blend until ingredients are incorporated.
Mix in chocolate chunks until evenly distributed
Scoop 1″ balls of dough onto parchment-lined cookie sheet
Take the back of a fork and press firmly down until fork tine marks appear in flattened cookie (but not too hard!)
Bake for ~10 minutes until cookies are lightly browned
Transfer to a wire rack to cool completely (if you can wait that long!)
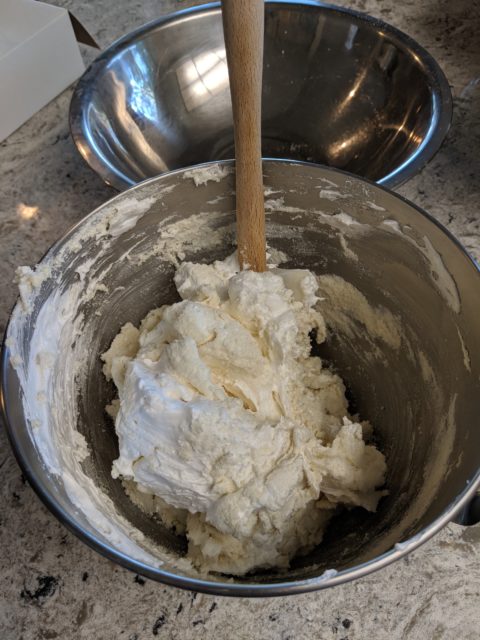
So if you thought I had a death wish when I decided to tackle puff pastry, think again. Pastry, shmastry! Puff pastry was a cake walk compared to making French macarons for the first time. Now I know why Laduree and Nadege charge a pretty penny for these dainty sweets.
To be honest, I didn’t spend a ton of time researching this recipe and maybe my results are proof that I should have spent more time studying before breaking out the almond flour. But I had six egg whites in the fridge after making those yummy Portuguese custard tarts. And I think I was feeling a little overconfident after making those divine tarts, nay, impatient to prove I could succeed again at making a *Patchka* recipe.
So here’s the deal with French macarons: historians tell a story of their origins in the 18th century around the time of the French revolution. Nuns who were seeking asylum made the meringue-like biscuits to sell in order to pay for their lodging at the local convent (there seems to be a pattern here with members of the cloth having a knack for baking–Portuguese custard tarts, anyone???). However, there are many other versions of the dessert that apparently date back as far as the 8th century.
And the name alone actually comes from the Italian “maccherone,” which means fine dough. There are accounts of future Queen of France, Catherine de Medici bringing the recipe over from Italy in the 1500’s.
The macarons we think of today–the two round biscuits sandwiched with a sweet filling in the middle–didn’t gain popularity until the 1930’s.
I watched an excellent tutorial by John, over at the Preppy Kitchen. He is meticulous and detailed in his explanation of the what, how and why of making macarons. There is even a term called “macronage” when it comes to incorporating the almond flour and icing sugar mixture with the stiffened egg whites. He is also not above pointing out that it took him many attempts before he got a decent batch of the cookies.
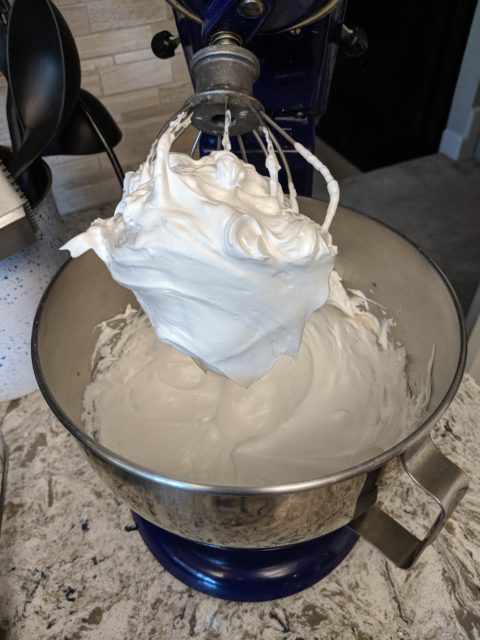
Super fine almond flour and icing sugar are sifted not once, not twice, but three times!Egg whites are whipped to a marshmallow-like consistencyThe delicate dance of “macronage” is underway.
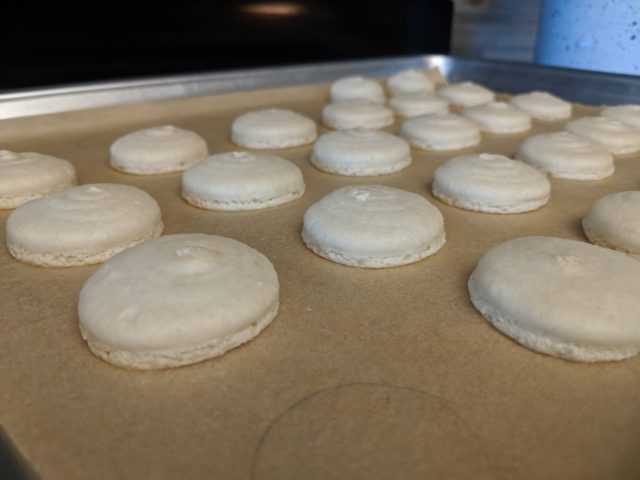
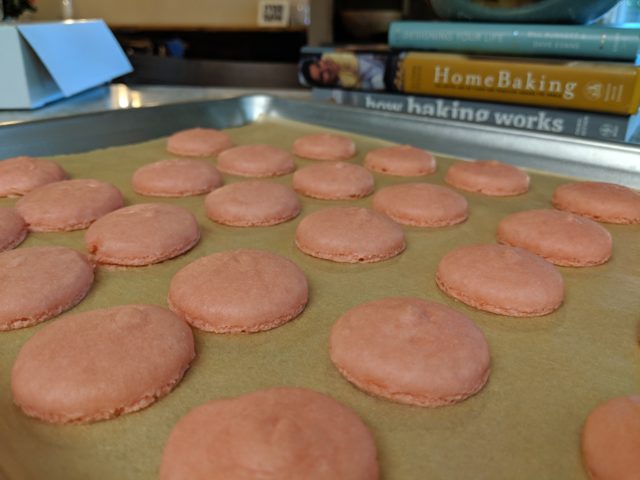
Although I followed his instructions religiously, my biscuits did not come out with a nice glossy finish or crispy exterior as I had hoped. I blame the oven entirely. They taste delicious even if they look a little bit withered. And they are nice and fluffy and chewy.
The results of my first bake
Oh, my dull withered macarons…
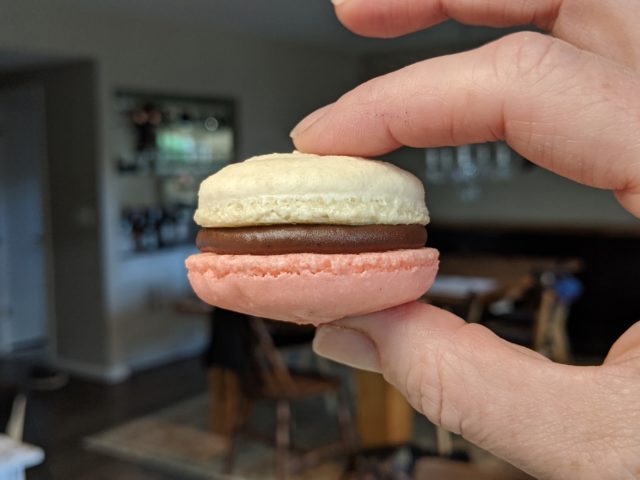
I made a simple chocolate ganache for the filling. Next time I think I’ll try a caramel filling or french buttercream. Or maybe I’ll use some homemade jam!
Kind of looks like a Neopolitan cookie, doesn’t it?
All these ideas have bolstered my resolve to attempt the recipe again. Just not tomorrow. I need to recover from Round One.
My first batch of vanilla macarons with chocolate ganache filling
Did my puff pastry cliff hanger work? Well you needn’t wait any longer! I used about a third of my puff pastry recipe to make Portuguese custard tarts, which are one of my favourite pastries.
While the French introduced the world to puff pastry in the 17th century, the world would have to wait until the 18th century before Pasteis de Nata were invented.
Using my handy dandy Google translator, the literal translation of the pastry’s name is “you’re welcome pastry,” and you should thank the monks and nuns of the Jeronimos Monestery near Lisbon for these delightful creations.
I consulted with my tome on Home Baking, by husband and wife duo, Jeffrey Allford and Naomi Duguid, for the recipe.
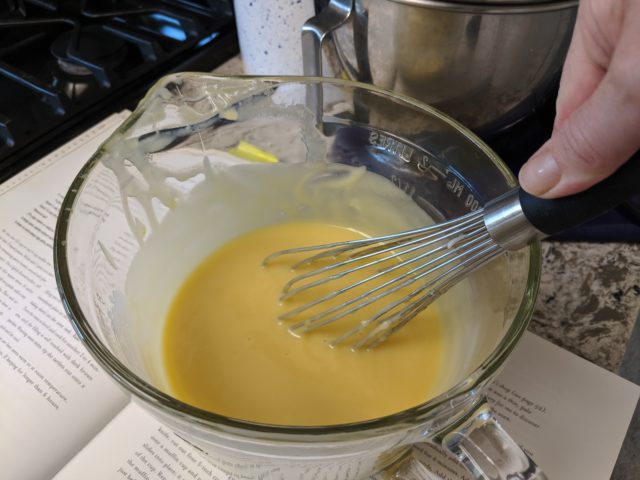
I can’t say it was all that difficult to prepare, but you should note that you only use egg yolks for the filling, so plan ahead and make sure you’ve got another recipe up your sleeve for those egg whites (hint: recipe #5 involves egg whites!).
I was pleasantly surprised to learn that the filling didn’t call for much sugar and as such, is not that sweet. But it is creamy and silky smooth and egg-y. The secret, I discovered, was to whisk the mixture excessively so there wouldn’t be a single lump or bump in it.
Whisk that egg-y filling!
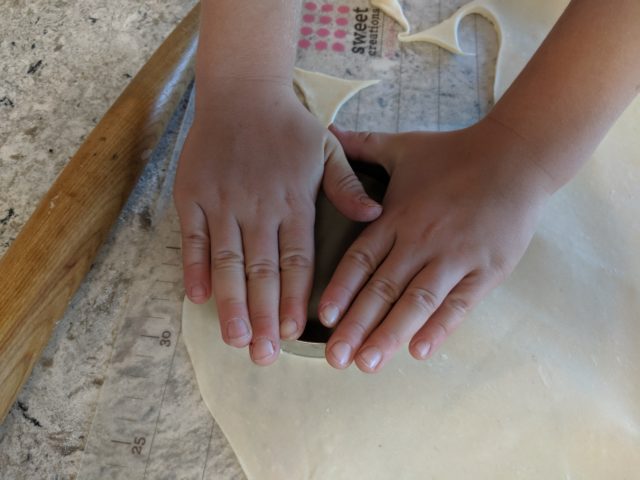
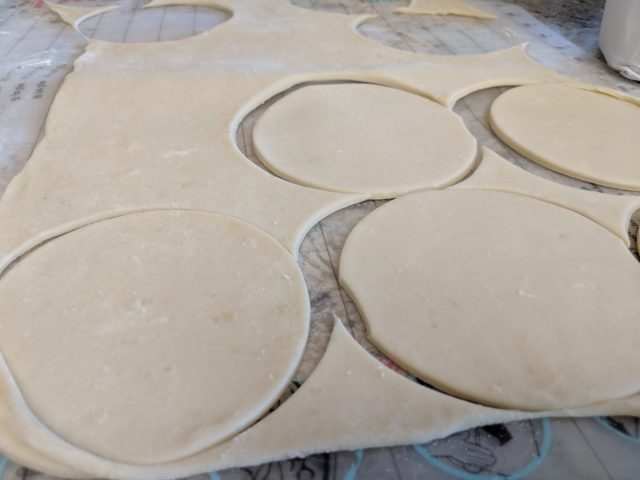
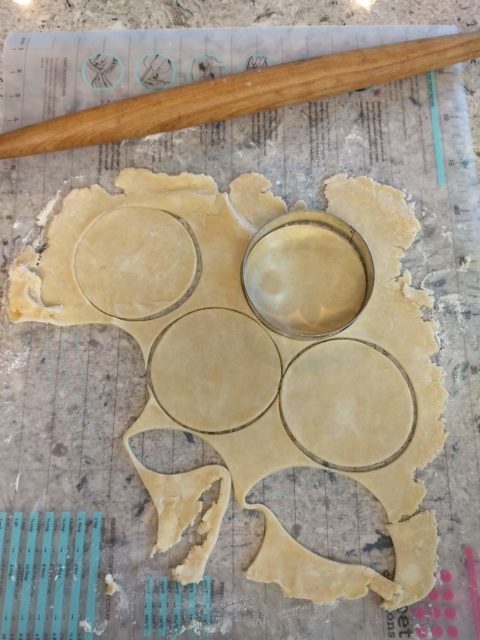
The puff pastry, as you’ll see, was worked very quickly and chilled in the freezer while I prepared the filling (I even had help from some little hands!). It is the perfect vehicle for the filling and compliments to the creamy filling with a crunchy, buttery exterior.
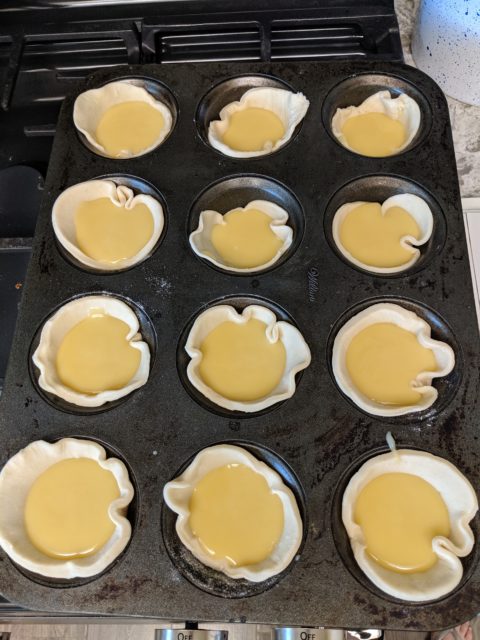
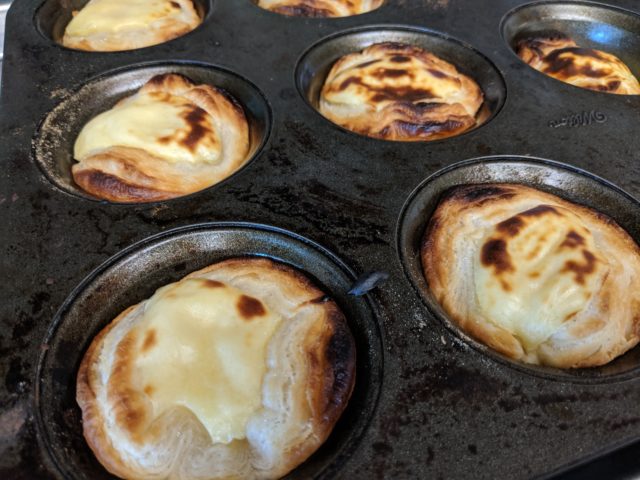
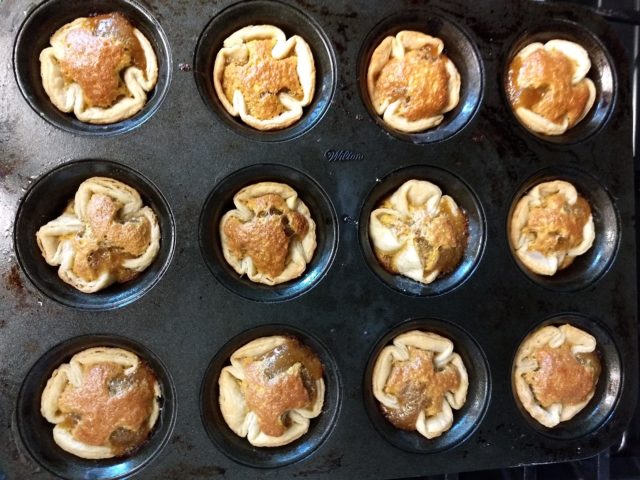
Little hands made the puff pastry work go quickly4 inch rounds were cut out of the puff pastry and placed into a 12 cup muffin tinA perfect marriage of puff pastry and custard
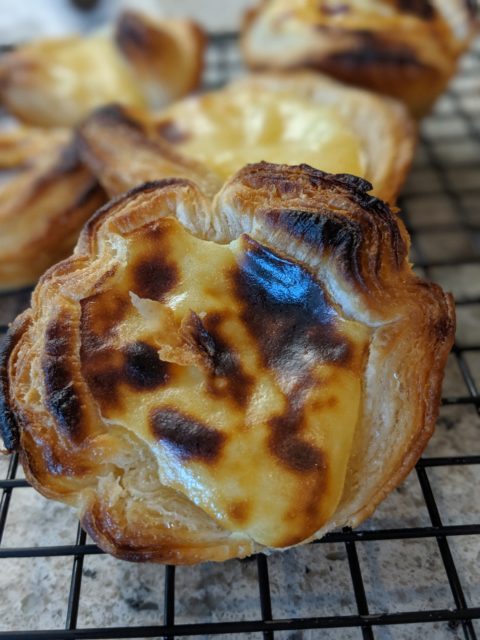
It is baked at a high heat and then at the end gets a quick broil to create that nice browned, almost charred, top.
The finished Portuguese custard tarts straight out of the oven
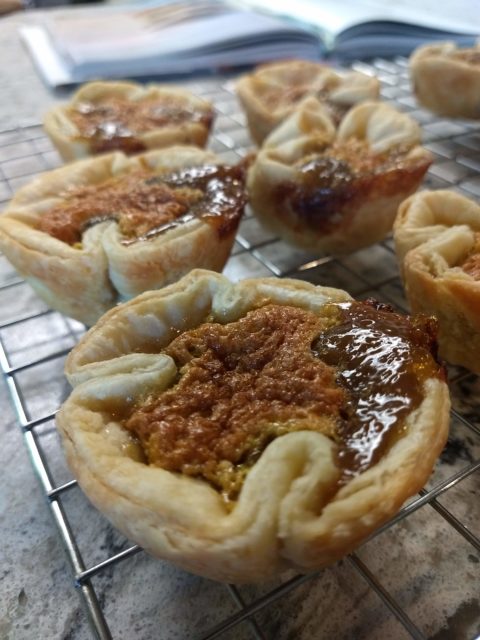
The tarts are very quickly transferred to a wire rack to cool followed shortly thereafter by devouring, gobbling, you name it.
This homemade Pasteis de Nata is ready for its close up
Anyone who wants to make their own puff pastry from scratch must be asking for a death wish, right? Who, in this day and age of convenience foods would dain to make the most Potchka (Yiddish translated: finnicky) pastry known to mankind? That would be me.
I read about making “rough puff” which is the home baker’s shortcut method of making puff pastry. And I did seriously consider doing that as a time saver. But who was I kidding? I knew this was going to take time so why not roll up my sleeves and take the scenic route.
I familiarized myself with the process by watching Anna Olson’s instructional video.
According to lore, puff pastry was invented by a French pastrycook’s apprentice in the mid 1600’s. Apparently there is evidence that something akin to French puff pastry already existed in Spain, and of course, in Greece there was phyllo dough (which I haven’t attempted to make yet). Regardless of its origins, puff pastry only gained in popularity with the passage of time and is now used as a staple in all sorts of patisserie.
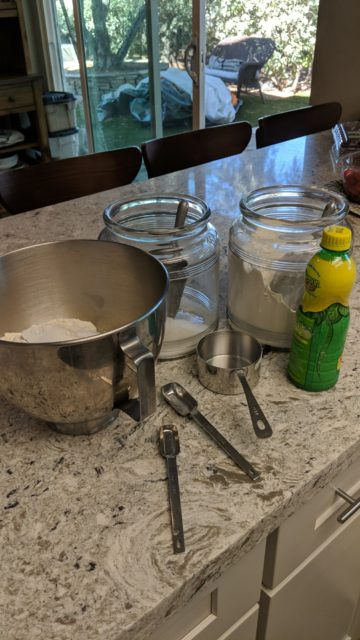
The process starts with making the detrempe–that’s the flour, water and a bit of butter “base.”
Setting out the ingredients for my puff pastry
This is followed by the beurrage, which is just pounds of butter (that’s three pounds in this particular recipe to be exact), mixed with a wee bit of flour so that it is maleable and doesn’t turn into a giant blob of greasiness.
Following the instructions closely, both of these were pressed into plastic wrap in an 8 inch by 8 inch pan and then placed into the fridge to chill for a minimum of 2 hours.
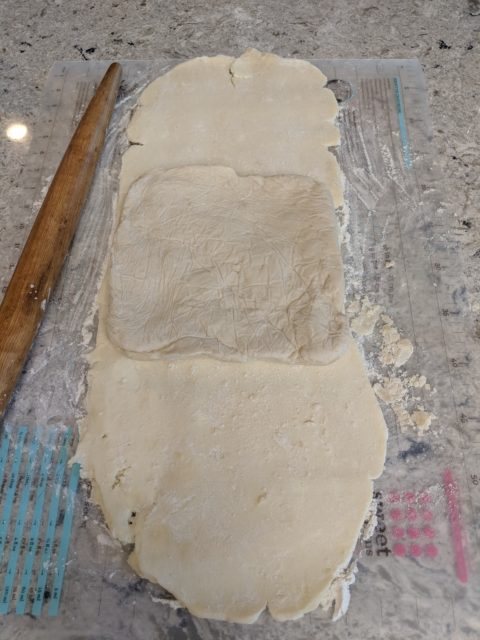
The next step involves laminating the detrempe and the beurrage together without compromising the integrity of each layer. Both need to be cold but maleable enough to roll out. I followed Anna’s suggestion and actually wrapped the flour mixture in the butter, which is not how most recipes suggest doing it.
That is butter (ALOT of butter) wrapping around the dough
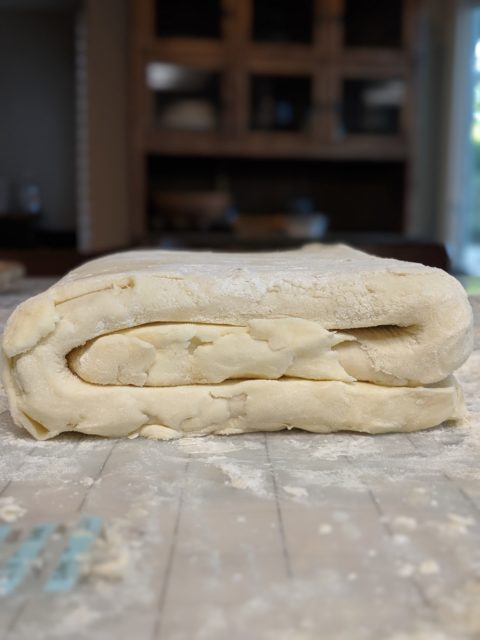
I worked quickly so as not to melt the butter layer. I folded and turned my sheets of pastry on itself in thirds a couple times before wrapping it up in a neat package and popping it back in the fridge for more chill time.
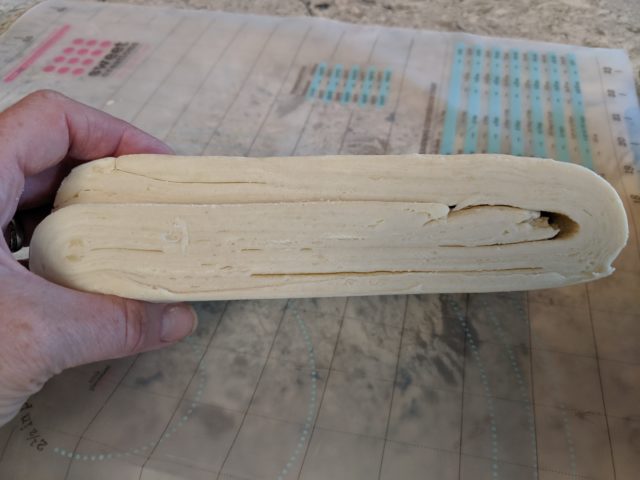
I repeated this a couple of times so there would be a good 12 layers or so.
Then I had to figure out what to make with this precious dough…would it be croissants? Tarts? Turnovers? Or should I go savoury and make something like Beef Wellington? Or chicken pot pie? You’ll have to wait until my next post to find out!
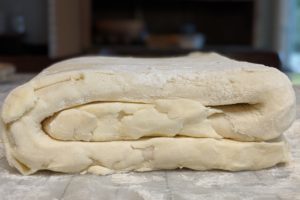
It may not look like much, but that is the beginnings of puff pastryThe laminated puff pastry, ready to become something delicious to eat!
The only reason I’m posting this right now is because I’m feeling a tad patriotic (and because some fellow Canadian moms asked for the recipe!). At the time of writing, the Raptors are in the NBA finals against the Golden State Warriors, who play but an hour away from the home I am sitting in right now. #WeTheNorth mania has taken over Toronto and much of the country north of the 49th parallel, not to mention a lot of the United States. There is even going to be a viewing party in San Francisco for one of the games co-hosted by the Canadian Consulate and Maple Leaf Sports and Entertainment (the owners of the team).
It also feels like summer outside and I equate butter tarts with summer, not to mention Canada Day, which is around the corner too.
I’ve tried a few butter tart recipes, but I think this one is my favourite so far. The pastry is super easy to make and easy to manipulate–IF you follow the instructions.
And the filling is also straightforward. You are more than welcome to add raisins, pecans, craisins, or whatever your heart desires. I’m a purist and like to keep it plain. They are super rich, super sweet with a super flakey pastry and super worth the time and effort.
You’re non-Canadian friends will thank you, but be careful: once you share these with them, they will want them again. And again. And again.
Rosie Daykin’s Quintessential Butter Tart
Start by making All Butter Pastry (makes enough for a couple dozen tarts)
5 cups of all-purpose flour
1 teaspoon salt
2 cups butter, chilled and cut into 1-inch cubes
1 large egg
1 tablespoon white vinegar
water
Place flour and salt in a large bowl, drop the butter all over the flour mixture. Using a pastry cutter, cut the butter into the flour until it resembles large crumbs. You should still be able to see some butter in the flour.
Crack the egg into a liquid measuring cup and add the vinegar. Top up with enough cold water until it reaches 1 cup. Whisk until combined. Pour over the flour and butter mixture.
Mix with a fork until the dough starts to come together and looks ragged. Use your hands to gently finish mixing the dough and it takes shape. You should still see some butter bits!
Divide the dough into four even disks about 1/2 an inch thick. Wrap in plastic wrap and refrigerate for a minimum of 2 hours or better yet, overnight.
Now prepare the filling:
3 large eggs
1 1/2 cups light brown sugar
1 1/2 teaspoons vanilla extract
3/4 teaspoon lemon juice
1/2 teaspoon salt
3 cups of sultana raisins (if you like raisins!)
Whisk all the above ingredients together and put in a liquid measuring cup with a spout so it’s easy to pour.
Roll out the chilled pastry on a floured surface with a rolling pin to about 1/8 inch thick. Use a 4 or 5-inch circular cutter to cut out the pastry circles.
Make sure your muffin tin is well greased with shortening (I use Crisco).
Rosie’s secret technique: Take each circle and pinch it at two points, best visualized as 3 o’clock and 9 o’clock. Then lift up and pinch 12 o’clock and 6 o’clock and place in the muffin tin. Fill the tin with the pastry and then chill in the fridge for about 10 or 15 minutes.
Fill each tart shell with about 2 Tbsp of raisins (or not). Then top with the filling until 2/3 full.
Bake in a 350 degree oven for about 20 minutes or until the pastry has browned and the centre of the tarts are puffed and golden.
Make sure not to drip the filling down the side of the muffin tins, otherwise the sugar mixture will stick to the pan and you will have trouble getting the tarts out.
Allow tarts to cool a bit before removing from pan.
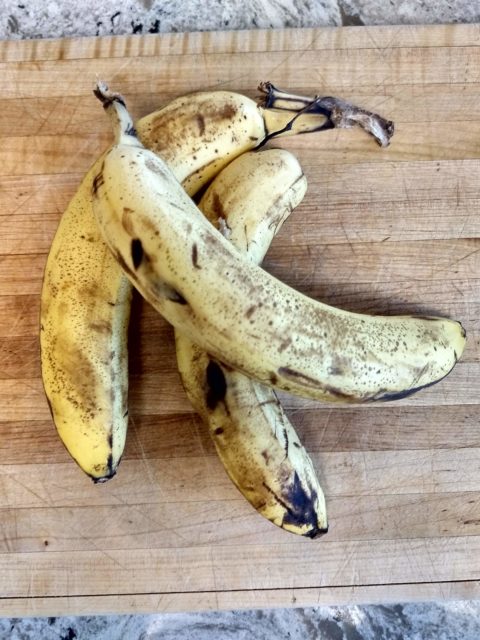
Browning, slightly bruised bananas: perfect for making cake!
Clearly I couldn’t wait to get started on this baking project! But the truth is, it was the bananas that couldn’t wait. They had passed their peak for eating, and had been languishing on the kitchen counter for a couple of days practically begging me to turn them into a sweet and moist semi-healthy dessert (okay, not so healthy if it falls into the dessert category).
I got this recipe from my mother many, many years ago and pretty much know it off by heart. It is dairy-free, which I consider to be a positive. However, it does call for A LOT of sugar. I think I could probably cut down on the sugar, but I haven’t tried yet.
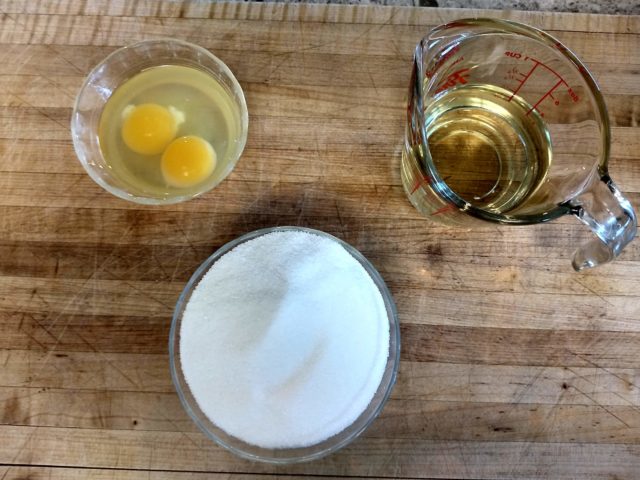
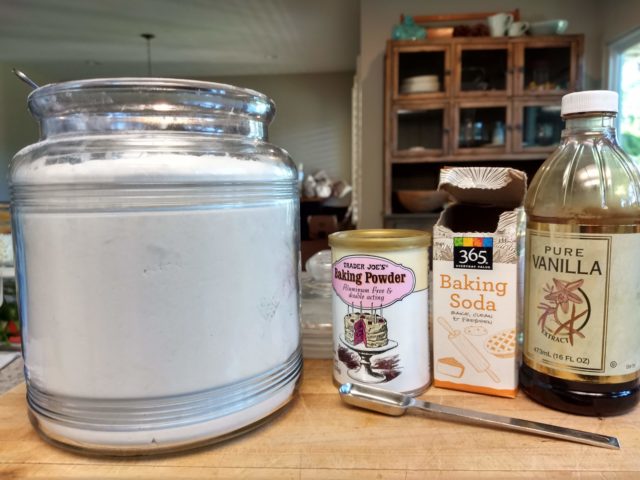
Two eggs, half a cup of canola oil and a full cup and a half of sugar go into this cake
Flour, baking powder, baking soda and vanilla are added after the wet ingredients are combined
Sometimes I bake this batter into muffins so the kids can take it to school in their lunches, or I’ve even done it in a loaf pan, but it seems to have a hard time baking through the centre because it’s such a wet batter.
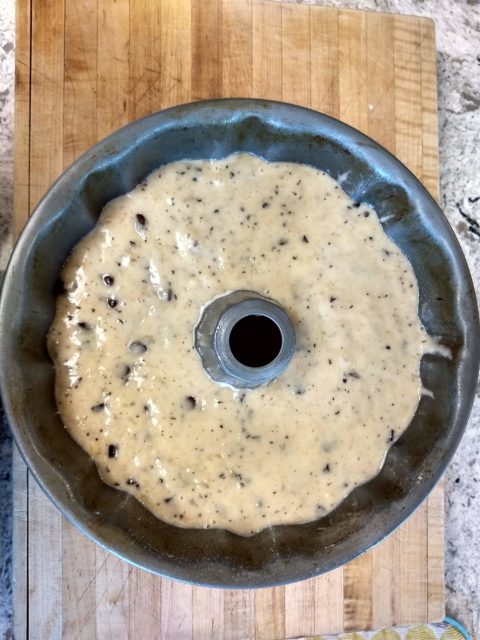
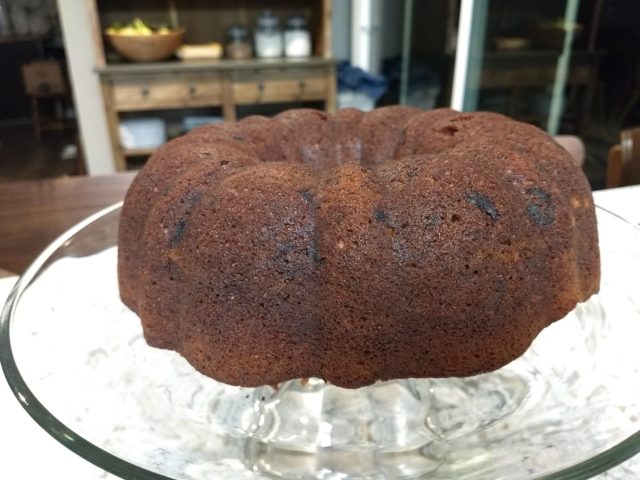
Today I went for the classic bundt cake, which makes it bake up beautifully with a deep brown outer layer. An important note about the chocolate chips: if you use full size semi-sweet chocolate chips, they sink to the bottom of the batter, thus sticking to the side of the pan so that when you turn it out, your cake will have pock marks. I confess, I used about half a cup in this recipe, but I also added in chopped up semi-sweet chocolate bits and they did not sink to the bottom of the pan.
A well greased bundt pan will make it easy to turn the cake out after baking
The recipe I normally use also calls for half a cup of either orange or apple juice. I think this simply makes the cake more moist and gives it a nice glossy shine on top. I did not have any juice in the fridge today, but I did have a bowl of homemade apple sauce, so I used that instead and I think I might like the results better this way.
This is one of the most adaptable cakes I have ever made. It’s like an outfit that can go from day to night–it’s a great cake that you can call “bread” if need be, but it can also be fashioned into a layer cake with mocha or chocolate icing for a special occasion, which I have done in the past, particularly for birthday celebrations. Once you’ve made it as many times as I have, you will quickly realize that the threat of bananas going bad in your house is a non-starter because you can take those over ripened fruits and turn them into a delicious cake that is good to eat any day of the week.
A perfectly baked banana chocolate chip bundt cake
Banana Chocolate Chip Cake/Bread/Muffins
3 overripe bananas
2 eggs
1 1/2 cups of sugar
1/2 cup canola oil
2 cups of flour
1 teaspoon baking powder
1 teaspoon baking soda
1 teaspoon vanilla extract
1/2 cup of orange juice
1 cup of chocolate chips or chunks
DIRECTIONS:
Mix the bananas in a standing mixer or with a hand mixer until they are smooth. Add in the eggs, sugar and oil and mix until thoroughly combined.
Add the dry ingredients, alternating with the remaining wet ingredients (baking powder, then vanilla, then soda, then OJ), mixing after each addition. Add the chocolate chips.
Pour into a well greased bundt pan, or a parchment lined loaf pan, or into muffin cups.
Bake at 350 degrees. Baking times will vary depending on what you are making. Cakes and loafs will take close to an hour to bake, while muffins take between 20 and 25 minutes. Test the cake by inserting a toothpick or wooden skewer into the centre. The toothpick must come out clean or “dry.” Let the cake cool for 10 minutes before turning it out on to a cooling rack.
Muffins can be removed immediately so you can make the next batch–just don’t burn yourself!
Cookies, cakes, pies and squares fall into my bailiwick when it comes to baking sweets. I cannot say the same for fine pastries, breads or savoury baked goods. That doesn’t mean I don’t want to learn how to bake those things. I just hadn’t considered it before. “Before what?” you ask.
Before The Great British Bake Off.
Judges, Paul and Prue flank show hosts, Sandi and Noel
Yes, I got hooked a couple of weeks ago. And yes, I’ve been living under a rock for the past five years. I am not normally a fan of reality television involving competitions that induce sweating, heart palpitations and all manner of anxiety riddled activity. But I did like learning about different methods of baking and types of pastry that are commonly found in England and in bakeries, but rarely attempted by the home baker.
Given my propensity to learn and try new things in the kitchen I have devised a plan (well, it’s more like a list at this point in time) to make pastries I have never attempted before. Here’s my list so far:
Scones
Croissant
Puff pastry
“Rough puff” pastry
Hot water crust pastry
Choux pastry
Sugar work
Italian meringue
Mousse
Sponge cakes
Meat pies
Crackers
Swiss roll
Donuts
Madeleines
Danish
Pavlova
Chocolate Work
Ginger Bread
Marzipan
Streudel
I think that’s a pretty decent list to start with, don’t you? My plan is to turn it into my next 365 day project on Instagram, although I know I’m not in the kitchen 365 days a year (although pretty darn close to that).
SO! Wish me luck. I may not begin right away, but I’m going to figure out which pastry to tackle first. Don’t worry: you’ll know when the bakefest begins. EVERYONE will know! The key is to do this and not gain a bajillion pounds doing it. As my friend Shelley once exclaimed after seeing a post of my bakes, “How do you not weigh 400 pounds?!?!?” I figure if Christina Tosi can bake Crack Pie and Birthday cake pops among the many other tooth achey creations she bakes and still look fit as a fiddle, so can I.
It’s been one year since our family of five moved from Toronto to San Jose, California. I feel as though the last twelve months have flown by, and yet I feel as though I haven’t accomplished much personally or professionally in that time. For someone who is really good at getting a lot done when given a list of to do’s and a deadline, I’m also very good at being critical of myself.
To counter the negative, I’m going to do an exercise that is supposed to list the positives: what I have accomplished in the last twelve months—things that demonstrate all the skills I have cultivated professionally and personally have been put to good use. So here goes!
Research
I have researched the heck out of my new city. Doctors and dentists for children (and me) have been found and visited.
Speaking of doctors, navigating the health insurance system has been an education unto itself. The amount of time dedicated to research on this subject alone is immeasurable, and yet I feel I should be remunerated in some way for the pain and suffering it has caused me (yes, I’m being facetious, but just a little bit).
Driving routes to school and hockey practices have been cemented in my mind after countless excursions that I don’t need to rely on Google Maps anymore.
Grocery stores that carry the right kind of condiments, loaves of bread, cuts of meat, and snacks for school lunches have been raked over with a fine-tooth comb. I go to no less than three grocery stores to get what is needed. You read that right: THREE different stores! (sometimes more)
My research continues as the need arises. This skill has probably been the most integral to our settlement in a new city and country.
I also do research on where to go and what to do with the kids when we have free time, if we have the energy to go anywhere. There have been many excursions to the coast, sampling of different ice cream shops, exploration of hiking trails primarily with a friend of mine and the dog, trips up and down the peninsula in search of delicacies I crave, discoveries that even the locals don’t know about or haven’t bothered to explore. For the most part I have enjoyed this part of my research.
Researching involves benchmarking and I’m not sure what the benchmark is for excursions. This is where I still feel like a tourist that’s living in this town. If it were home I wouldn’t be excited by the vistas and views of and from the mountains and ocean. It would just be part of the scenery.
Organization & Scheduling
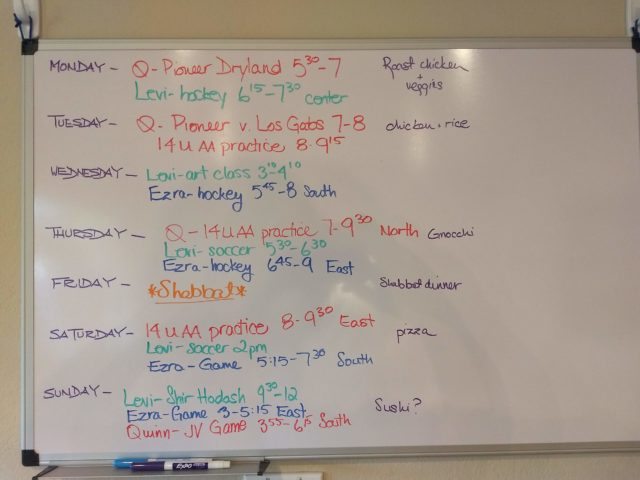
Three kids. Three schools. Three sets of extra curricular activities. Keeping organized and staying on schedule should go without saying, but there’s more to it. I went old school and invested in a white board. Yes, we always keep the kids’ activities colour-coded in Google Calendars, but I’m a visual person so writing out their activities and appointments has been a great way to keep track of all the moving parts.
I also did real meal planning successfully for the first time ever. They say the road to hell is paved with good intentions, but I managed to stay out of hell most of the time and stick with the plan. It also meant a lot less food waste, and meal planning has become, to my pleasant surprise, rule by consensus. I write out my ideas for meals and the kids weigh in with their ideas or change the ones they don’t like. Normally that would put me in a bad mood, but their participation in meal preparation has raised their awareness about the amount of time, effort and thought that goes into it.
Having a white board has also eliminated many excuses from the kids about not knowing they had an activity, not being prepared for a test or not getting out of the house on time. Despite all the technology that exists to keep us organized, the simple act of writing down schedules has had a marvelous impact on the family.
The infamous white board!
Networking
As I’ve said in a previous post, it’s hard making friends in your 40’s. I have been fortunate to meet some great people since my move, but it wasn’t happenstance that brought us together.
Meeting new people—making friends—is just like going on a blind date. So many of them were connections I made through Facebook groups. There are some people I have met who, I hope, will be lifelong friends. There are others who turned out to be a bad fit (can I call them wing nuts???). I’ve adjusted my expectations with respect to the success rate of these “matches.”
Networking is an art and a skill that requires time, effort and practice; something I learned from a former colleague of mine who has become a dear friend.
I also know I need to be in the right mindset to do it and that isn’t always the case.
Fortunately I have met people through different circles; some are parents of my kids’ classmates, some who are fellow Canadian expat moms and some who are fellow Canadian expat professionals who live and work in Silicon Valley. My circle of friends is small, but even my 11-year-old said, you don’t need a lot of friends, you just need good ones.
Volunteering
Since I am unable to work in this country, I thought I’d dip my toe into the volunteer pool and see how I liked it.
For the first time in the almost 15 years I have been a mother, I am able to volunteer at my kid’s school on a regular basis. Never able to commit to volunteering, I would pitch in at events like the spring fair on a weekend, even sitting on the Board of the boys’ daycare, but now I get to spend time with my youngest son and his class during the day. Once a month I plan and lead gardening classes with a fellow mom and I help out with the weekly lunch hour garden club with all the students. I love it!
There isn’t much for me to do for my older kids, but I do help out at the middle school snack bar, which gives me a chance to see what goes on at the school.
I have also volunteered to write for that Canadian expat professional group I mentioned before and contribute my expertise as a communications professional. There is something physiological that happens to a person when they volunteer. Maybe your body releases those feel good hormones called endorphins or maybe not, but in general I leave my volunteer gigs with a heightened sense of wellbeing. I will likely do more volunteering and make it a part of what I do going forward—even when I am back in a paid position. I never thought I had time for volunteering regularly, but now I know it’s so worth making the time.
Self Improvement
This is an interesting category because it could mean different things to different people. The first thing that comes to mind for me is my physical wellbeing. I have done more hiking in the last year than in my entire life and my dog loves me for that. I go hiking in the foothills near our home with someone who has become a good friend. I have also continued to run, but believe it or not, all this motion has caused repetitive strain injuries. So I’ve returned to yoga, which has been wonderful. I have also started taking pilates classes.
My eating habits are a different story!
My body is being looked after and now I am turned to improving my mind. My biggest worry about not being able to work was that my intellectual muscles would atrophy if I didn’t use them every day. Having to think strategically, have intelligent conversations and generate ideas is something I genuinely love to do and I miss it.
I’ve decided to enroll in online learning courses on design thinking and business strategy. No, it’s not the same as waking up every day and going to work, but it means keeping the synapses firing in my brain by learning something new and continuing to grow.
So that’s been my year in a nutshell. I could tell you so much more, but I think I’ll save it for another time…right now I have to go do yoga and try out a new dinner recipe on my kids!
I couldn’t think of a snappy title for this post because there really are no words to describe the amount of driving I do to get my three boys to school, soccer, hockey or anything else that requires transportation to and from said activity.
I’m at the rink right now as I write this, waiting for the stress chemicals to stop coursing through my veins after getting my six-year-old to and from soccer practice, followed by a trip to the rink with the other two for their hockey practices. I’ve now got almost three hours ahead of me before I get to go home, put on my pyjamas and climb into my cozy bed and have sweet dreams–about doing this all over again in another day!
I’ve done the math, and I visit the rink, on average, eight times a week. EIGHT. TIMES. A. WEEK.
Yes, I’m like an Uber or Lyft driver, but I don’t get paid for all the driving I do.
My commute to the rink is 15.3 kilometres in each direction (that’s 9.5 miles for you ah’muricans), and takes roughly 22 minutes. I call this commute The Drive of Utter Boredom.
The scary thing is my commute pales in comparison to that of other parents whose kids play hockey with my kids. There are some kids who travel anywhere from 40 kilometres to 96 kilometres to get to practices. I have no words…
Speaking of words, that is the best part of the drive with my kids–the conversation that otherwise wouldn’t happen! True, I have a captive audience, but more often than not, the kids are the ones who initiate the conversation. I’ve learned so much about what my kids are doing at school, talking about with their friends, or just thinking about at this point in their lives. I’ve had some very memorable conversations with the boys that likely wouldn’t have happened if we hadn’t been in the car together.
I can’t remember where I read it, but apparently it’s less intimidating to talk about difficult things when you aren’t in direct eye contact with the person you are talking to. So driving in a car or going for a walk are great opportunities to have meaningful conversations with your kids because they can talk about things that might otherwise be awkward or embarrassing.
This past summer I was driving with one of the boys from our cottage to drop him off at camp. The majority of the drive was spent talking about puberty, girls, sex, pregnancy and child birth. We basically covered the entire sex ed curriculum and then some–all of it initiated by my son. It was a great conversation. I felt so proud of him, that he felt confident–and safe–enough to have that kind of talk with me. His mom! Now he doesn’t have to wonder or go searching for answers on the internet. It was a proud parenting moment for me. I thought, “well I must have done something right if he feels like he can talk to me about this stuff.”
Despite my constant cursing and lamenting about the amount of time I spend on the road logging a lot of mileage, I do appreciate the time it has afforded me with my kids. They aren’t on their screens. We listen to music and sing along. We even have meals together in the car (no, I know, this is not ideal). It’s like our family room on wheels. I hope I look back on this period in my life with fond memories of trips to the rink, but who am I kidding? While I’m in the thick of it, I can’t imagine that, but before I know it, it will be over and the kids will be old enough to drive themselves (Yikes!!!!) or their hockey careers will be over. So I’ll take those conversations in the car while they last.