Get Your Garden On!

I think I can say with some confidence this past weekend was the first REAL weekend of Spring. And I say that because we spent more time outside than inside. It was absolutely glorious. Saturday was my “day off” from parenting duties, but hardly a day off. I decided to follow through with a purchase I’ve been wanting to make for some time, that being a very large scale planter for my front flagstone patio. The two plastic square planters flanking the front steps were serviceable but they were feeling a little insignificant so they’ve been relegated to the back deck for another gardening project. Planters are a great way to get creative without having the hassle of weeds and unpredicatable soil conditions. Planters are their own little microclimate, perfect for whatever style of garden tickles your fancy.

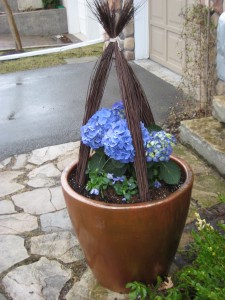
I found the planter of my dreams at HomeSense for a reasonable $59.99. It’s ceramic, which means it will be more high maintenance than the fibreglass kind, but definitely worth the hassle. It’s got a gorgeous irridescent copper glaze, which ties in perfectly with the front facade of the house. Rather than fill the entire pot with gravel and soil, I inverted a large plastic pot in the bottom and poured the soil in around it. Seeing as it’s still April, the garden centres didn’t have a whole lot of plant material to choose from just yet, so I’ve only just started to fill in the planter. Blue is my colour of choice for the planter this season. My centrepiece is a lovely blue hydrangea surrounded by periwinkle pansies. I took some decorative grasses and tied them into a little trellis above the hydrangea. The trellis will be more than just decorative; I’ve seeded a whole bunch of Heavenly Blue morning glories, and I’ll transplant these into the planter when they are mature. A lot of people choose pussywillows for the trellis feature, but rather than spend more money on something decorative, I’ll save that money for more plants.  I’m waiting to fill in the perimetre of the planter with a nice trailing vine, like ivy or potato vine. That should be available by the May long weekend. In the meantime every time I walk in and out of the house, I get to enjoy my handiwork.
Early Spring Planter

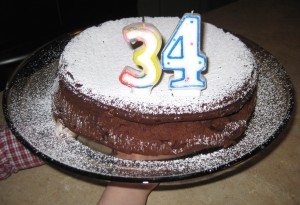
Flourless Chocolate Cake

Yes, Passover is over. But I couldn’t let it go by without mentioning my flourless chocolate cake. You see, my husband’s birthday falls in and around the time of this blessed holiday. This isn’t the end of the world if you’re an adult, but if you’re a kid, well then it is the end of the world because your cake choices are severely limited by the restrictions associated with Passover. No Angel Food Cake, no anything cake that requires baking powder, baking soda or flour. So your options are really limited to ice cream cake and cheesecake. But what kid is going to want cheesecake? And after a long, cold winter what kid is going to want to indulge in a mouth numbing brain freezing birthday cake? So I say to heck with it! Bake a really good chocolate cake, minus the flour. I came across this recipe quite by chance. It’s not in a Jewish cookbook so it isn’t even designed to address the dietary restrictions of Passover. It just happens to fit the bill. Come to think of it, it’s also a great cake to make for someone who can’t eat any gluten. I found the recipe in a book called “The Clueless Baker” penned by Evelyn Raab, who recently retired as food editor for Today’s Parent Magazine after twenty years. I own many a cookbook but I must say, of them all I really enjoy Evelyn’s wit and sense of humour in this book. I wouldn’t classify this recipe as “easy” or “beginner,” because there is some egg separating involved and that can be a little dicey for some people, not to mention the folding of the stiffened egg whites. So this recipe isn’t for the faint of heart. But once it’s been made, it can be enjoyed by all! It’s rich, not overly sweet and smooth much like a chocolate mousse. I’ve included a couple pictures, which really don’t do it justice. If you really want the full sensory experience, bake it.

Flourless Chocolate Birthday Cake

KIDS’ BIRTHDAY CAKES

I think it’s fitting that during the one week of the year I am not allowed to partake in eating any food stuffs made with leavening agents (eg. baking powder) I’m going to write about birthday cakes. Those who know me well know that I love to bake. I’ve always dreamed of selling cakes, pastries, cookies and breads at a bakery but I’m not sure that romantic vision would translate into cold hard cash. I don’t think I’d like to wake up at the crack of dawn to bake baguettes and chocolate chip cookies for customers only willing to pay me 2 bucks a loaf and 50 cents a cookie.  I have yet to figure out the business model that would allow me to bake my treats at my leisure and at at the same time convince a paying customer that my cakes are worth $500 a pop. So until I turn that dream into a reality I like to bake for my family. In particular, since becoming a Mom, I started challenging myself to bake birthday cakes for my two boys that were kid-friendly to look at, but adult-friendly to taste.

This year I baked my younger son a rich chocolate cake in a cake mould shaped like a race car. I “mounted” the #2 blue car on a sheet of chocolate chip cookie iced to look like asphalt. The cake recipe came from the original Barefoot Contessa cookbook  and the cookie recipe, which I doubled, came from Ina Garten’s Barefoot Contessa Parties! My older son, who turned 5, had far more specific stipulations about what kind of cake he wanted and how exactly it should look. He vascillated between a vanilla “Buzz Lightyear” cake and a lemon “Batman” cake but I reminded him he had the Buzz Lightyear cake for his 4th birthday, so he settled on the latter. So a lemon cake it was (a sophisticated palate for a 5-year-old, no?).  The cake recipe came from Martha Stewart and it’s called a “1-2-3-4 lemon cake.” There’s a lovely lemon curd that I made to go between the layers and the icing is just a simple butter cream. Take a look at the cake I made for the little guy this year.

Blue Race Car Cake
Blue Race Car Cake
Head-On View
Head-On View


Man Oh Manischewitz!

Passover begins tonight. And that means eating lots of eggs, meat, vegetables (that don’t fall into the legume category) and of course, matzah.

For the uninitiated matzah is supposed to be the modern-day version of unleavened bread. During biblical times the Jews, in their haste to leave Egypt after 400 years of slavery, did not  have the time to let their bread rise before baking it. They ended up with what look like over-sized crackers that are, in my opinion, devoid of any redeeming flavour.

Today, these oversized crackers, made under the strict supervision of a rabbi, come in a number of varieties. Plain, whole wheat, egg, spelt, even chocolate dipped. My husband and I are partial to egg matzah which is made with “matzah flour,” sweet apple cider and eggs.

Matzah is also “repurposed” into a flour, a “cake meal” or straight up “meal,” which I often use for matzah ball soup, in meatloaf, meatballs and hamburgers. I actually think it’s better than using bread crumbs because for a product that isn’t suppose to encourage leavening, matzah meal has the astonishing ability to add fluffiness and fullness to my meat dishes.

As I write this entry I have a dozen matzah bagels baking in the oven. I, like my ancestors, was distracted by my two young “Pharaohs” and in a rush when I was making them, so the bagels look more like pancakes. I’ve made these before so I know something’s amiss. I followed the recipe in my cook book, Second Helpings, Please! This cook book was originally published in 1967 as a compilation of recipes by the Montreal-based Mt. Sinai Chapter of Jewish Women International of Canada. My grandmother first gave me this book when I moved in with my husband (then boyfriend). I misplaced the book in my many moves back and forth across the country. I was crestfallen by this loss because that book was very special to me. So when my mom gave me a new copy two years ago with an inscription on the inside of the cover with a sentimental note, I was very touched.

My first attempt at the matzah bagels aren’t worthy enough for a picture, but thankfully I have eight WHOLE days to try this recipe again and get it right. And when I do, OH! when I do….I will be sure and put a picture of the tasty morsels up on the site along with the recipe. Unlike me, you will no doubt have the time to let the bagels cook properly. Right now my modern-day Pharaohs are ordering me out of the house and into the car to take them to their grandmother’s Seder. So in that vein I will say see you in Jerusalem….Happy Passover!

Chestnuts, Brownies and Snowdrops

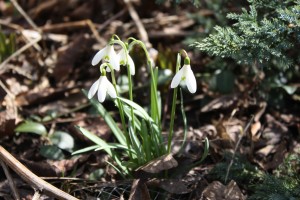
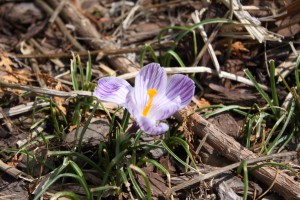
I feel like I’m having a bit of an identity crisis. I’m eager to get into my garden as I see the first signs of Spring have sprung in the form of crocuses and snowdrops. But I’m a cautious optimist. Unlike friends and neighbours who have already raked up the remnants of Fall’s leaves and collected dead branches and dried up plant stalks in anticipation of the Spring bloom, I’m waiting to see if Old Man Winter has really left the building. While I’d like to be out in the garden getting everything “ready,” there’s a voice playing in my head saying, “ready for what? Have you read the long range forecast lately?” And so I continue to exercise restraint, choosing instead to pay my respects to the last vestiges of winter by baking the ultimate comfort dessert, super chocolatey brownies and throwing together a pot of puréed chestnut soup.

Snowdrops
Snowdrops
Crocus
Crocus

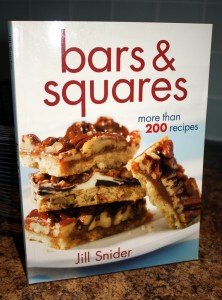
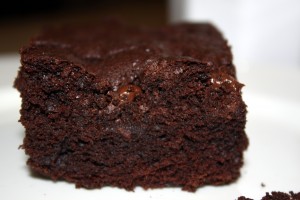
I attempted a new brownie recipe this weekend from a book given to me by my brother and sister-in-law. It’s simply called “Bars & Squares” by Jill Snider. I’ve casually flipped through the book and thought about attempting a few of the recipes. I thought there were only a couple of brownie recipes in the book when I first started assembling my ingredients. Well, had I been paying closer attention I would have noticed the book has an entire section devoted to the brownie. In my haste I began putting the ingredients together for the “Brownie Overload” recipe, which calls for an astounding 2 1/2 cups of coarsely chopped bittersweet chocolate. Then I notice the recipe calls for nuts and dried cranberries. Yuch! That’s not a brownie! So I start flipping pages only to discover I have 23 brownie recipes to choose from. But I have to stay the course, because I’ve already measured and mixed my dry ingredients and chopped up most of my chocolate. So, about an hour later I end up with a 13 x 9 pan of ultra-rich brownies. I think I over baked them a bit much, but all I need to do is throw one into the microwave for 11 seconds and it is absolutely heavenly. Perfect for an early Spring day to fight off a chilly breeze.

bars & squares by jill snider
Mmmm....brownie
Mmmm....brownie

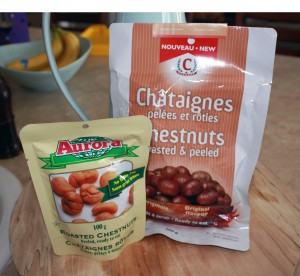
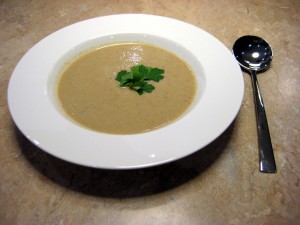
And finally, before the weekend concluded I promised myself I’d get around to making the chestnut soup recipe that my close colleague and friend, Susan Bishop was kind enough to share with me. She gives credit to New York Times cooking columnist and author, Mark Bittman, for the recipe. And true to Susan’s words, this was a very easy recipe to make. The hardest part of this recipe was finding the main ingredient, because fresh chestnuts are out of season. So I decided to do like Susan and buy the package of roasted and peeled whole chestnuts. A simple enough task, no? No. Upon inquiring as to the whereabouts of said chestnuts, not a single grocery store clerk had any idea what I was talking about let alone where in the store I might find said chestnuts. But I persevered and eventually after visiting grocery store #4, I found them in amongst the dried fruit and nuts. I was pleasantly surprised to see several brands available. In the end I opted for two different size packages because I wasn’t sure how many came in a package or how many I’d need. The recipe essentially involves sweating chopped onions and celery in olive oil with salt and pepper. Add 10 large chestnuts (I didn’t really measure this out) and cook in 4 cups of chicken broth for roughly 30 minutes. I let it cool and then threw it all in a blender. Susan says she likes to garnish the soup with shitake mushroom caps sliced and sautéed in butter until crisp, but I didn’t have any. And after the hunt for the elusive chestnuts I didn’t really want to venture back into the grocery store. As for the soup, it has a nice, light nutty sweet flavour and because it’s cooked in a chicken broth and there’s no cream added, it’s not a heavy soup. No doubt great as a starter or on it’s own with a good piece of fresh baguette for sopping it up.

Peeled chestnuts
Peeled chestnuts
Chestnut
Chestnut


So there you have it. A weekend spent looking forward to the impending Spring with a nod to the passing winter, which no doubt will have its final day of reckoning before we can safely put away our boots, jackets, gloves and hats. In the meantime I’ll be happy slurping my soup and nibbling brownies.

Spring One Of A Kind Show

I may have mentioned that in this blog I want to feature others who are into the “homemade” way of living, and artisans tend to be those who best live by that mantra.

So it’s always inspiring to meet someone who does what they love for a living and finding a whole bunch of people who do what they love for a living all in one place is even better. This place is called the Spring One Of A Kind Show and I had the pleasure of attending the opening with my friends Barb and Jenny. We wandered the show floor to meet the vendors and check out their wares.

Among the many talented artisans we discovered several who were creating unique and beautiful clothing, jewellery and accessories. And now I get to share their stories with you.

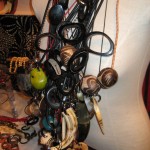
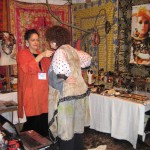
“ANTLER LADY”- Actually her name is Dandi Maestre and she makes beautiful jewellery from found objects. She moved to Toronto from Columbia six years ago. Originally trained as a graphic designer, Dandi, like so many new to Canada decided to reinvent herself when she moved to Canada. Dandi’s accessories were recently seen on the runway at Toronto Fashion Week in Lucian Matis’ collection. Dandi, a self-taught jewellery designer, describes her pieces as “tribal.” Using all-natural materials like horn, hooves, antlers, seeds from the Amazon, coconut and reclaimed wood, Dandi’s jewellery really are statement pieces. This jewellery is definitely for the confident woman.

Colourful necklaces
Colourful necklaces

An assortment of bracelets
Objects from nature transformed into jewellery
Dandi helping a customer

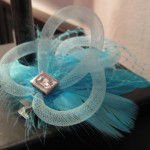
“FEATHER GIRL”- Nicole McInnis is a third year student studying fashion design at Ryerson University.  She was selling these precious hair ornaments at the Show. If you can’t make it to the show this weekend, you can always check out her online shop, Oh Dina! on Etsy.com To her delight, there were many shoppers interested in her accessories. They ranged in price from $30 to $125. Nicole, who also loves to make hats, says she gets her inspiration from Pin Up girls, vintage Hollywood glamour and as she says, “anything pretty.” Great for dolling up any outfit, or even as an accessory for your wedding day up-do, these feathered friends really are worth checking out. My photographs hardly do these ornaments justice, so go visit her Etsy site to get a better view.

A turquoise feather hair clip
An assortment of headbands

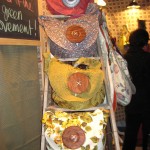
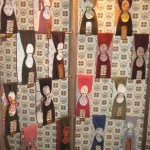
Honeybea Design Hive– This vendor immediately caught my eye when I saw these lovely button bags on display. Becky Caulford is the creative genius behind Honeybea. With fashion design under her belt, Becky decided to create a line of “sustainable fashion” five years ago and began pedaling her wares at fairs and festivals across the country. Traveling in her VW wagon dec’d out with daisies Becky is a modern girl living the flower child lifestyle. Her fabulous button bags ($79) truly are eye-catching, as are her sexy mama halter tops ( for $59 which I procured for myself, as did Jenny) all have a very ’70’s vibe about them. All of her gear is made from discarded fabrics and objects like curtains, coasters, napkin and curtain rings (the “buttons” on her bags are actually made from vintage wooden drink coasters!) that she finds at thrift stores. Becky truly is a modern-day environmental maven. The best way to describe her style? “Not hokey, but folky.”

Button Bags
Button Bags
70's inspired belts
70's inspired belts
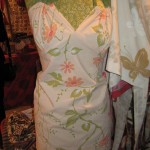
Sexy halter tops
Sexy halter tops
Becky
Becky

Sunday Brunch

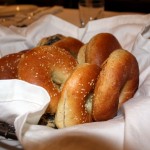
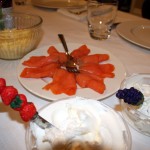
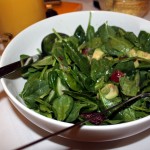
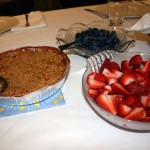
There are no rules when it comes to brunch. The in-between nature of the gathering essentially gives me license to serve anything I want to my guests. The very melding of the words breakfast and lunch suggests the meal can and should be a combination of cold and hot dishes both heavy and light in nature. I love hosting brunch because it really allows me the freedom to get creative in the kitchen. I like to take my inspiration from Barefoot Contessa, Ina Garten. In the past I have hosted brunches, both elaborate and simple in menus, for birthdays and showers or just as an excuse to get family and friends together. The latter was the reason for today’s brunch and the menu was relatively simple: fresh Gryfe’s bagels, cream cheese, lox, an assortment of hard cheeses, my favourite Beit Yitzak wild blueberry jam, spinach salad with cucumber, avocado and blood orange in a vinegrette, freshly baked peach raspberry crisp and fresh strawberries and blueberries.

Our guests included Dave’s parents, his uncle Ted and Aunt Dru in for a visit from New Jersey, as well as my parents who decided to crash the party for a short time. Oh yes, and the kidlets. Who can forget the kidlets???

There will be many more brunches to write about in the future. And I do hope people share their favourite brunch menus with me.

bagels
Fresh Gryfe's bagels
lox-cream-cheese
Lox & Cream Cheese
spinach-salad
Spinach salad with avocado, cucumber & blood orange
peach-crisp-fruit
Peach raspberry crisp & fresh fruit


RECIPE: Peanut Butterscotch Chocolate Squares

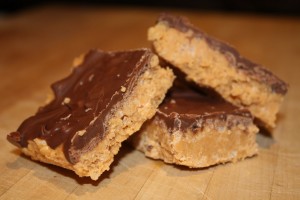
I admit, I have not “made” anything since my last entry. However, I am making the time to make an account of the items I have made in recent days. I got all nostalgic on the weekend and made a number of childhood favourites for my two boys, like chocolate pudding in individual cups, raspberry Jell-O and my grandmother’s peanut butterscotch chocolate squares. Super simple. Super delicious. It would fall into that “half-made homemade” category of baking that always wows a crowd. AND it’s ridiculously easy to make. It’s especially pleasing to those who enjoy the chocolate peanut butter combo. So here’s the recipe:

DORIN’S PEANUT BUTTERSCOTH CHOCOLATE SQUARES

Melt 1 cup of peanut butter (must be like Skippy–not all natural) with a heaping cup of butterscotch chips. This takes time, as the chipits have a stabilizer in them that makes them finicky to melt.

Once melted, mix with 4 cups of crushed Rice Crispies (or another kind of crispy cereal that crushes easily)

Pour into a 8 inch x 8 inch baking pan

Melt a heaping cup of semi-sweet chocolate chips and spread evenly on top of peanut butterscotch mixture and refrigerate.

After cooling completely, take it out of the fridge and allow to come up to close to room temperature and cut into squares (this will prevent the chocolate from shattering into jagged pieces).

ENJOY!

Peanut Butterscotch Chocolate Squares

Welcome to home-made.ca, a place for all things homemade

Welcome to home-made.ca! A place for all things homemade. This is my first (albeit brief) post on this page. I have big dreams for this page, not the least of which is to show you all the great things that I like to make at home. That’s a catch-all for cooking, crafting, gardening, writing, my husband’s woodworking (my only contributions being the designs), and much, much more.

Ironically, I now hdorin_5ave to go and make dinner for the children. So I’ll be back soon. –dorin