Month: September 2019

Recipe #6: Kelly’s Peanut Butter Chocolate Chunk Cookies

Time for a break from making finnicky desserts and time for some down-to-earth comfort cookies. I fished out a recipe for these cookies that I got from my long time neighbour, Kelly. I remember she brought a freshly baked batch over to our house and they were gone in no time flat.

I can’t remember the last time I made these, probably because the kids can’t take these in their school lunches (or rather, I won’t let them–there are no laws here in California that prevent kids from bringing peanut and nut products to school, unlike in Ontario where Sabrina’s Law exists).

Some would argue these cookies bake best with processed peanut butter like Kraft or Skippy, but I only buy natural peanut butter. Just peanuts!

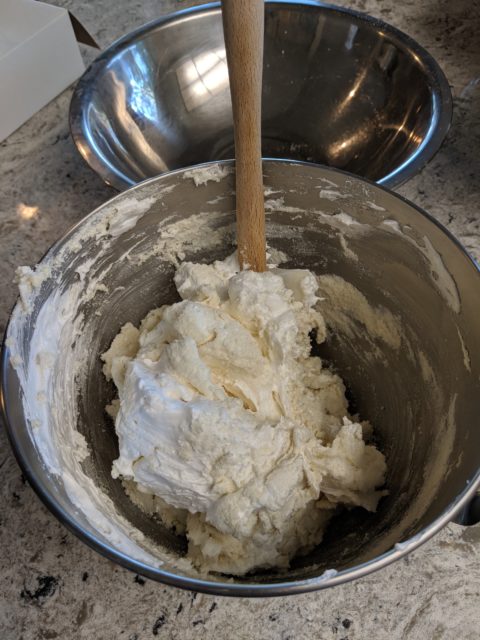
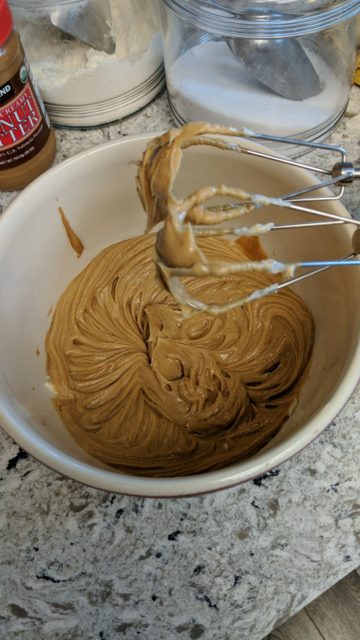
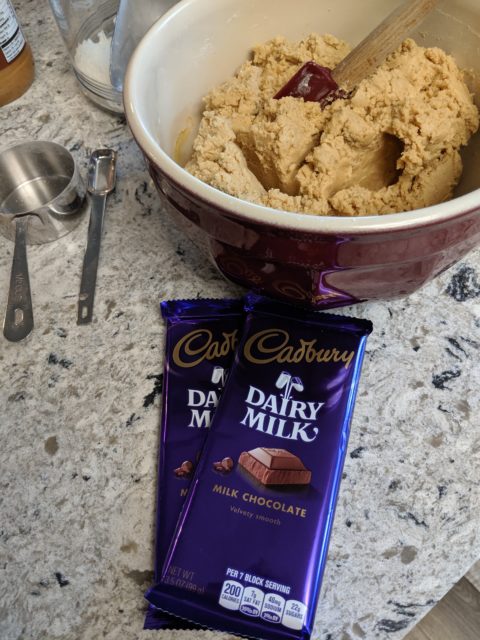
The butter mixed with the peanut butter was so creamy when I blended it together with the hand mixer.

Creamy peanut butter and unsalted butter

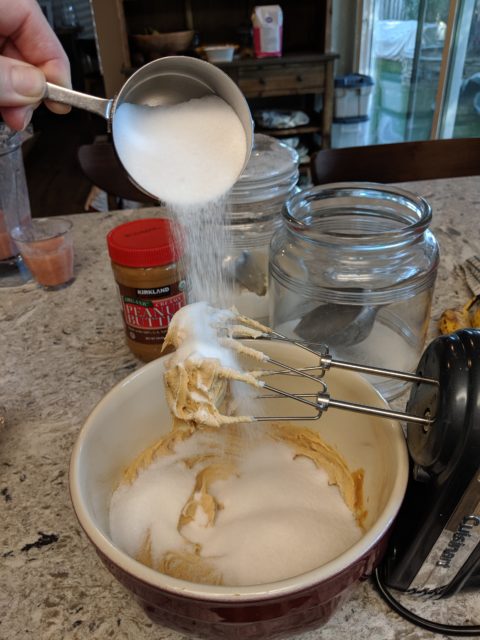
Then I added the requisite sugar, eggs and flour and voila! beautiful cookie batter.

Yes, sugar

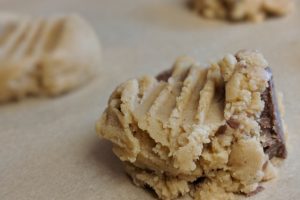
I found a couple of Dairy Milk bars in the cupboard and decided to crush them up and throw them in the batter instead of using chipits and I’m glad I did.

Chocolate + peanut butter= sheer perfection

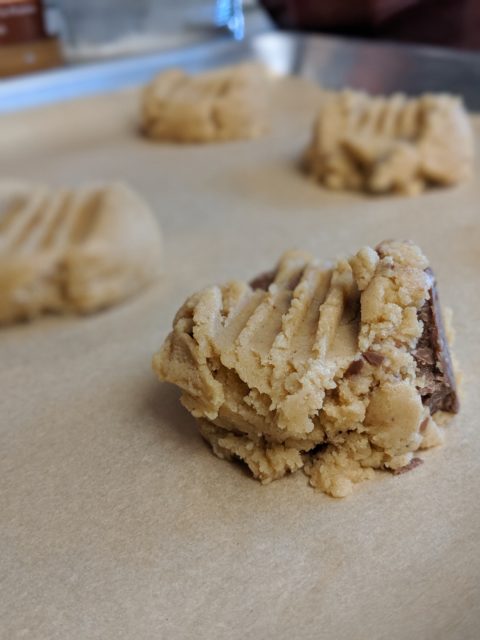
Just before baking, I used the back of a fork to press the requisite hash marks into each cookie. Because, peanut butter cookies. Right?

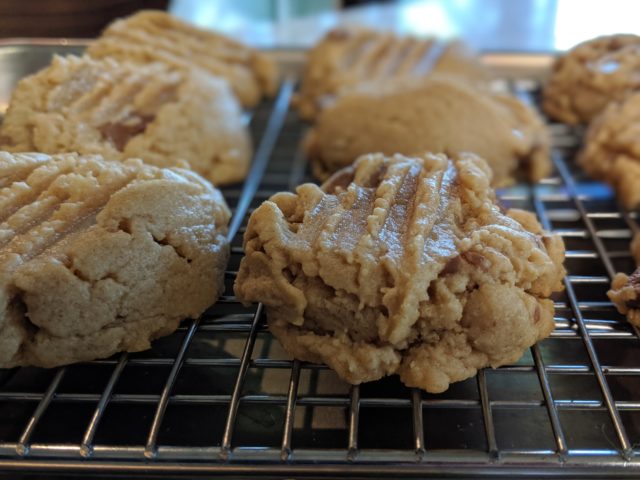
The resulting cookies were so creamy and delicious, and once again, they disappeared within a few days. I think the milk chocolate chunks also made a big difference.

These were quick and easy to make and didn’t require much, if any, skill or precision. So go make some!!!

Fork tine marks are required in peanut butter cookies
Let the cookies completely on a wire rack–if you can resist!

Kelly’s Peanut Butter Cookies

  • 1 Cup peanut butter (I like to use all natural smooth PB)
  • 1 Cup unsalted butter, softened
  • 2 eggs
  • 1 Cup granulated sugar
  • 1/2 Cup brown sugar
  • 1 tsp baking powder
  • 2 1/2 Cups, all purpose flour (or you can do half whole wheat flour for a slightly denser cookie)
  • 2 bars of your favourite chocolate bar (I used Dairy Milk), crushed up into chunks

Instructions

  • Preheat oven to 350 degrees
  • Blend peanut butter and butter together in a standing mixer or with a hand mixer until completely incorporated
  • Add eggs and blend followed by sugars
  • Add baking powder and flour(s) and blend until ingredients are incorporated.
  • Mix in chocolate chunks until evenly distributed
  • Scoop 1″ balls of dough onto parchment-lined cookie sheet
  • Take the back of a fork and press firmly down until fork tine marks appear in flattened cookie (but not too hard!)
  • Bake for ~10 minutes until cookies are lightly browned
  • Transfer to a wire rack to cool completely (if you can wait that long!)

Recipe #5: French Macarons

So if you thought I had a death wish when I decided to tackle puff pastry, think again. Pastry, shmastry! Puff pastry was a cake walk compared to making French macarons for the first time. Now I know why Laduree and Nadege charge a pretty penny for these dainty sweets.

To be honest, I didn’t spend a ton of time researching this recipe and maybe my results are proof that I should have spent more time studying before breaking out the almond flour. But I had six egg whites in the fridge after making those yummy Portuguese custard tarts. And I think I was feeling a little overconfident after making those divine tarts, nay, impatient to prove I could succeed again at making a *Patchka* recipe.

So here’s the deal with French macarons: historians tell a story of their origins in the 18th century around the time of the French revolution. Nuns who were seeking asylum made the meringue-like biscuits to sell in order to pay for their lodging at the local convent (there seems to be a pattern here with members of the cloth having a knack for baking–Portuguese custard tarts, anyone???). However, there are many other versions of the dessert that apparently date back as far as the 8th century.

And the name alone actually comes from the Italian “maccherone,” which means fine dough. There are accounts of future Queen of France, Catherine de Medici bringing the recipe over from Italy in the 1500’s.

The macarons we think of today–the two round biscuits sandwiched with a sweet filling in the middle–didn’t gain popularity until the 1930’s.

I watched an excellent tutorial by John, over at the Preppy Kitchen. He is meticulous and detailed in his explanation of the what, how and why of making macarons. There is even a term called “macronage” when it comes to incorporating the almond flour and icing sugar mixture with the stiffened egg whites. He is also not above pointing out that it took him many attempts before he got a decent batch of the cookies.

Super fine almond flour and icing sugar are sifted not once, not twice, but three times!
Egg whites are whipped to a marshmallow-like consistency
The delicate dance of “macronage” is underway.

Although I followed his instructions religiously, my biscuits did not come out with a nice glossy finish or crispy exterior as I had hoped. I blame the oven entirely. They taste delicious even if they look a little bit withered. And they are nice and fluffy and chewy.

I made a simple chocolate ganache for the filling. Next time I think I’ll try a caramel filling or french buttercream. Or maybe I’ll use some homemade jam!

Kind of looks like a Neopolitan cookie, doesn’t it?

All these ideas have bolstered my resolve to attempt the recipe again. Just not tomorrow. I need to recover from Round One.

My first batch of vanilla macarons with chocolate ganache filling

Recipe #4: Portuguese Custard Tarts

Did my puff pastry cliff hanger work? Well you needn’t wait any longer! I used about a third of my puff pastry recipe to make Portuguese custard tarts, which are one of my favourite pastries.

While the French introduced the world to puff pastry in the 17th century, the world would have to wait until the 18th century before Pasteis de Nata were invented.

Using my handy dandy Google translator, the literal translation of the pastry’s name is “you’re welcome pastry,” and you should thank the monks and nuns of the Jeronimos Monestery near Lisbon for these delightful creations.

I consulted with my tome on Home Baking, by husband and wife duo, Jeffrey Allford and Naomi Duguid, for the recipe.

I can’t say it was all that difficult to prepare, but you should note that you only use egg yolks for the filling, so plan ahead and make sure you’ve got another recipe up your sleeve for those egg whites (hint: recipe #5 involves egg whites!).

I was pleasantly surprised to learn that the filling didn’t call for much sugar and as such, is not that sweet. But it is creamy and silky smooth and egg-y. The secret, I discovered, was to whisk the mixture excessively so there wouldn’t be a single lump or bump in it.

Whisk that egg-y filling!

The puff pastry, as you’ll see, was worked very quickly and chilled in the freezer while I prepared the filling (I even had help from some little hands!). It is the perfect vehicle for the filling and compliments to the creamy filling with a crunchy, buttery exterior.

Little hands made the puff pastry work go quickly
4 inch rounds were cut out of the puff pastry and placed into a 12 cup muffin tin
A perfect marriage of puff pastry and custard

It is baked at a high heat and then at the end gets a quick broil to create that nice browned, almost charred, top.

The finished Portuguese custard tarts straight out of the oven

The tarts are very quickly transferred to a wire rack to cool followed shortly thereafter by devouring, gobbling, you name it.

This homemade Pasteis de Nata is ready for its close up

Recipe #3: Homemade Puff Pastry

Anyone who wants to make their own puff pastry from scratch must be asking for a death wish, right? Who, in this day and age of convenience foods would dain to make the most Potchka (Yiddish translated: finnicky) pastry known to mankind? That would be me.

I read about making “rough puff” which is the home baker’s shortcut method of making puff pastry. And I did seriously consider doing that as a time saver. But who was I kidding? I knew this was going to take time so why not roll up my sleeves and take the scenic route.

I familiarized myself with the process by watching Anna Olson’s instructional video.

According to lore, puff pastry was invented by a French pastrycook’s apprentice in the mid 1600’s. Apparently there is evidence that something akin to French puff pastry already existed in Spain, and of course, in Greece there was phyllo dough (which I haven’t attempted to make yet). Regardless of its origins, puff pastry only gained in popularity with the passage of time and is now used as a staple in all sorts of patisserie.

The process starts with making the detrempe–that’s the flour, water and a bit of butter “base.”

Setting out the ingredients for my puff pastry

This is followed by the beurrage, which is just pounds of butter (that’s three pounds in this particular recipe to be exact), mixed with a wee bit of flour so that it is maleable and doesn’t turn into a giant blob of greasiness.

Following the instructions closely, both of these were pressed into plastic wrap in an 8 inch by 8 inch pan and then placed into the fridge to chill for a minimum of 2 hours.

The next step involves laminating the detrempe and the beurrage together without compromising the integrity of each layer. Both need to be cold but maleable enough to roll out. I followed Anna’s suggestion and actually wrapped the flour mixture in the butter, which is not how most recipes suggest doing it.

That is butter (ALOT of butter) wrapping around the dough

I worked quickly so as not to melt the butter layer. I folded and turned my sheets of pastry on itself in thirds a couple times before wrapping it up in a neat package and popping it back in the fridge for more chill time.

I repeated this a couple of times so there would be a good 12 layers or so.

Then I had to figure out what to make with this precious dough…would it be croissants? Tarts? Turnovers? Or should I go savoury and make something like Beef Wellington? Or chicken pot pie? You’ll have to wait until my next post to find out!

It may not look like much, but that is the beginnings of puff pastry
The laminated puff pastry, ready to become something delicious to eat!