Tag: food

My first attempt at sourdough bread

After watching Cooked on Netflix, I was inspired to make my own sourdough bread. After all, Michael Pollan swore it was the easiest thing in the world. All it takes is flour, water, and some wild yeast encouraged by the bacteria floating through the air in your house. Easy!

Not so.

My first attempt to make sourdough starter was an abysmal failure. The flour and water looked–and smelled–like glue, which I guess it was.

Then I showed up at work with a homemade sour cherry pie (that’s another post!) and started talking about baking with a colleague. Little did I know that she, too, had been inspired to attempt sourdough bread after watching Michael Pollan and she had met with some success. She offered to share some of her sourdough starter with me, pointed me to a website that had easy to follow instructions and then I was off to the races!

I had my doubts about the starter. It failed once again and I ended up with a loaf of glue. See specimen here:

Glue bread masquerading as sourdough bread

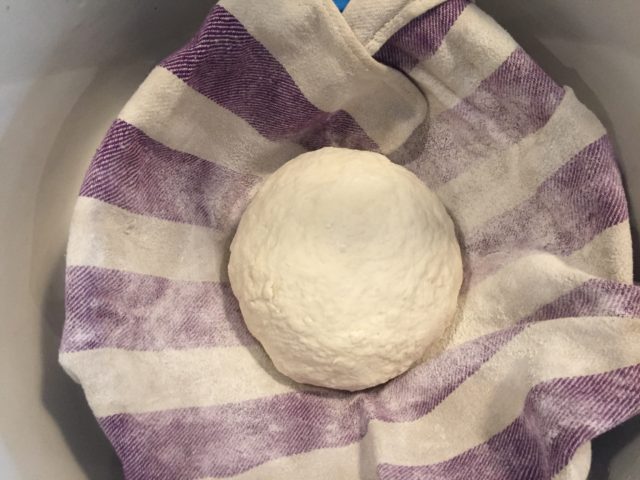
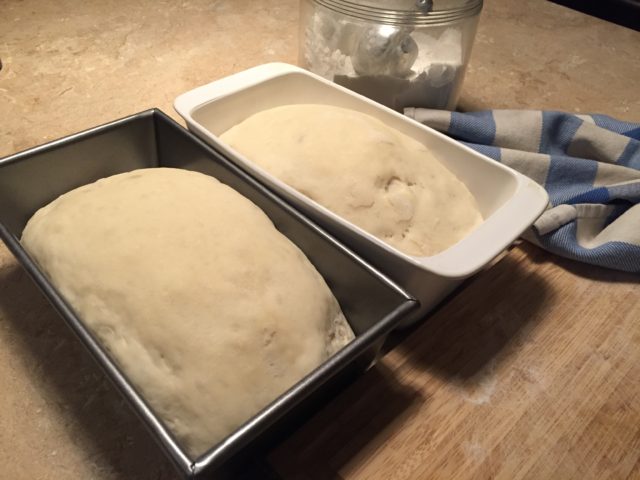
So I decided to persevere. For those who know me–and I mean, really know me, I am a relatively impatient person. So waiting for a sourdough starter to be ready, or waiting for bread to proof, are exercises in patience for me. And you can’t rush a good loaf of bread. I fed my starter again and decided to just watch it for about 24 hours. Sure enough it came back to life and started bubbling away, and almost “breathing”. That’s the best way I can describe it. It’s literally alive! When it had filled up the bowl, I decided it was show time.

I mixed the starter with flour and water and mixed it with the dough hook. I added a spoonful of kosher salt too. Some recipes tell you to knead the bread a lot and to do some of the kneading by hand to encourage the glutens to bind with each other. Other recipes say to be careful not to overdo it with the kneading because you don’t want to destroy the wild yeast in the starter that will give the bread that lovely bubbled centre. It’s really hard to know which recipe to follow and what measurements to use when you’re a beginner. This is when the internet is not your friend, but seems to be deliberately working against you to leave you second guessing which is the best recipe to follow.

In the end I found a pretty straightforward recipe at Cultures for Health. There’s even a nifty video that walks you through the recipe, but I decided to try it without watching the video. I think I might watch the video next time.

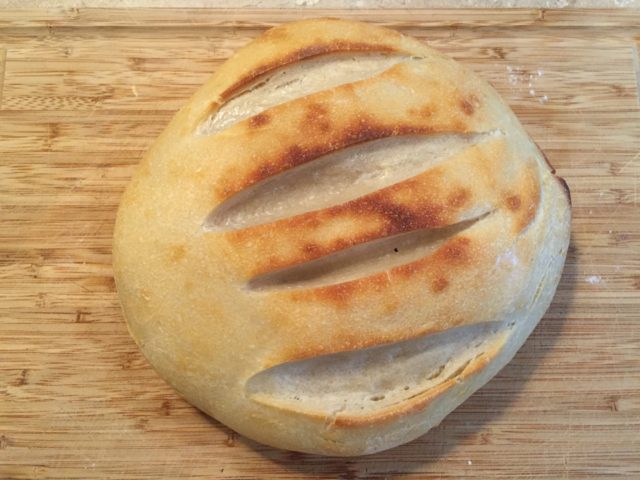
So here are the results:

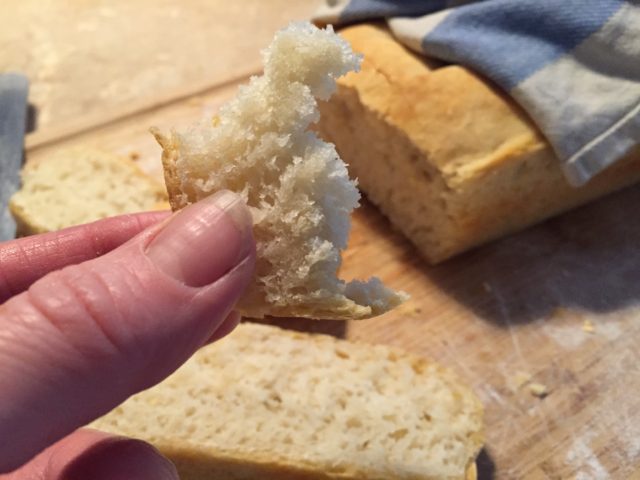
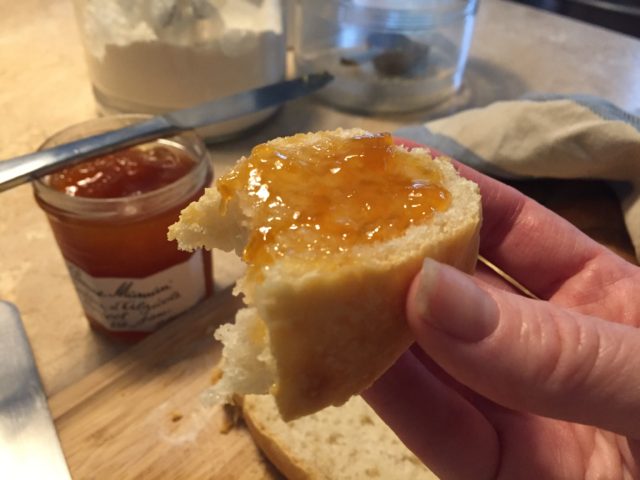
In the end the bread was quite tasty–crispy on the outside and nice and soft on the inside with some air bubbles that are indicative of sourdough bread. There is a nice tang to the flavour and the kids seemed to like it, which is a good thing. It didn’t puff up as much as it probably should have after proofing, which could mean one of two things: the sourdough starter wasn’t as mature as it should have been to help the bread rise, or else I didn’t leave it to proof long enough (12-ish hours???).

I can see why making bread is addictive. It’s not an exact science, and yet the success of your bread making depends entirely on science.

The sourdough starter is once again percolating away in the glass bowl on the counter and I look forward to my next attempt at making a loaf of sourdough. Let me know what the secret of your success is when making sourdough. I could use all the help I can get!

Wine and Cheese Party

It was my Dad’s 70th birthday this past week and to mark this amazing milestone my siblings and I planned a late afternoon wine and cheese party for him. 

The offerings were meant to reflect my father in the foods that we chose. We did this by visiting The Cheese Boutique. It was my first time there and I can’t believe that in all the years I’ve lived in this city I have never been there! Better late than never. This place was like a wet dream for foodies. The first thing I saw when I walked in was a wall of mustards, followed by a wall of balsamic vinegars and a wall of oils. It was like walking through a maze  of rooms, each dedicated to foodstuff. Jams. Teas and Coffees. Pastas and grains. A cold meat “locker.” Fruit and Veg. A cheese fridge–the ceilings were hanging with cheese and legs of prosciutto. And then the maze opens up to a room with a large cheese counter, the perimeter of which is surrounded by yet more culinary delights. The wall of chocolate. Pastry and breads. Oh! My! Heaven!

The Cheese Boutique
The Cheese Boutique
The Cheese Refrigerator

We got to sample some amazing cheeses and some charcuterie. These would be the centerpieces of our party. I started out by putting slabs of wood on the table that my brother-in-law had made. I decorated around these slabs with succulents and branches with berries and a few tea light candles to add some light. It was very Autumn-ish. Then came the food: cheese, meat, crackers, nuts, dried fruit, clementines, smoked fish, foie gras, fig jam, olives, gherkins, goat cheese, fresh figs, grapes. It was a veritable cornucopia of deliciousness. And it all got gobbled up! If you are looking for some inspiration, here are a few shots of the table.


Candles and plants interspersed with the food
Cheese and crackers
Cheese and crackers
Charcuterie
Charcuterie
The Whole Spread
The Whole Spread


Mmm….garlic dills!

Until today the only canning I had done was making jam. As of today I can add pickling to my repertoire. On a whim I bought a batch of mini pickling cucumbers. I knew time was working against me so while the baby was napping this morning I got to work. Sterilizing, boiling, brining, cutting, pouring, processing and voila, pickles!!!!

I found the recipe on a fabulous site called Food In Jars, which was fairly simple to follow. The only deviation was the pickling spices. Rather than make my own I bought a pickling spice mix at the grocers–much easier and less time consuming. Oh yes, and I didn’t have cider vinegar so I went with straight white vinegar.

Now comes the hard part: waiting. The recipe says they can be stored in a cool, dry place for up to a year but it doesn’t say when I can dig into them….maybe 3 months? 3 weeks? 3 days? 3 minutes? I’m not sure I can wait!!!


Kitchen Cheat Sheets

I was perusing Pinterest just before hitting the sack when I came across this fancy dancy kitchen cheat sheet. Although it applies moreso to people living in the UK, as it from Everest, I thought those of you who are diehard cooks and bakers would appreciate it. It’s a fabulous retro-looking download that you can print off and put up on your fridge or at the very least keep in a drawer close by for when you need to convert weights to cups, etc. Enjoy!


cialis online

Dinner for a hot summer evening

When I opened the front door this morning I was hit by a wave of hot air not unlike that which escapes from the oven when I’m baking cookies, except this was the air outside. Everywhere. The air we breathe. The forecast called for temperatures in the mid-30’s with a Humidex in the mid-40’s. Ugh!

Even thought it was morning I was already thinking about what to make for dinner. The last thing I wanted to do was turn on the oven IN the house. And I certainly didn’t want to fire up the barbeque and stand in front of a flaming hot grill. 

So I decided to make my version of a Nicoise salad. Nice and simple but hearty enough to fill the belly–and super easy.

First the fresh stuff: blanched green beans, sliced cucumbers, sliced tomatoes. and sliced red peppers.

Then the proteins and canned goods: a tin of tuna, a tin of chick peas, a tin of corn niblets, a tin of artichoke hearts and some sliced hard boiled eggs.

And finally I roasted some mini red potatoes, but I only used the toaster oven so my kitchen remained at a comfortable temperature.

Nicoise Salad

I think a true Nicoise salad also includes anchovies but I can’t count a single person in my household who would eat those salty suckers so I didn’t even consider it.

The boys gushed over the meal (they love hard boiled eggs and canned corn) and not a single bead of sweat was required in the preparation of this meal so I think I’ll be making this again soon.

Next time I might throw in some golden beets and avocado–other favourites in our household. If you’ve made your own signature version of a Nicoise salad let me know what you put in it.

We Be Jammin’

It’s that time of year again–the sacred few weeks when Ontario strawberries are in season. And that means it’s time to roll up my sleeves and make batches of sweet, yummy jam for everyone to enjoy–including the teachers. I always try and make the jam before the end of the school year so the boys can give jars of jam as gifts to their teachers.

If you have ever contemplated making jam but have been intimidated by the thought of it, don’t be. It’s the easiest thing ever. The only thing that might make you shy away is the steps involved–not many, but time consuming.

Before any jam making begins you must wash and sterilize your jars. It’s important to do this first otherwise your jam will start setting and you’ll be busy scrambling to get your jars ready.

First you have to wash and hull all the berries–probably the most time and labour intensive step in the process. You’ll also have a hard time resisting eating the berries as you wash them!

Ontario strawberries

Crushing the berries is the next step. Up until this year I simply used a potato masher to do this. But I got a hand blender recently and used this to crush the berries–actually I turned them into a pulp which made for a very runny, smooth jam. If you prefer having chunks of berry in your jam, make sure not to crush them too much.

Crush the strawberries

Next stir in the sugar. I like to use a product called Quick Set, which has some pectin in it already to help thicken the jam. If you want to know the berries-to-sugar ratio, it’s 1 kilo of sugar to 4 cups of *crushed* fruit but I just follow the directions on the bag. 

Berries and sugar!

Now it’s time to cook up the jam. Over medium heat in heavy pot let the mixture cook for 5 to 10 minutes. A foamy pink “scum” will form on the top of the jam and you need to skim this off with a spoon. The jam will come to a rolling boil and once that’s happened your jam is finished cooking.

Next get your jars out. Fill the jars almost to the top–leave a few centimeters for air to escape. I use snap lids on my jars. Once filled, I pop the jars in boiling water making sure the water covers the top of the jars completely and let the water boil away for about 10 minutes. This is called processing and it’s necessary so you can store the jars without refrigerating them. You’ll know this step worked when you hear the lids literally “snap” when they are suctioned down. You’re done! 

Mmmm...jam!

Now you can enjoy your jam slathered on a piece of fresh bread or crackers. Believe me, once you taste the jam you’ll realize it was worth all the effort.


Oh So Thankful For Good Food

My appetite has excellent timing. It’s been “on leave” for a while. Ironically, my stomach isn’t fond of the food that I like to eat. In fact, my entire digestive tract doesn’t like anything I put down my gullet. Humor me here for a minute: imagine eating a simple meal; it could be toast with peanut butter and a banana with a glass of O.J. in the morning. Or maybe a bowl of soup and tuna sandwich for lunch. Now imagine not feeling the slightest bit hungry when you’re supposed to be eating those meals and a full three hours later you feel as though you’re going to upchuck the sandwich, salad and the full breakfast. These have been the joys (or misfortunes) of my dining experiences as of late. I brought this to my doctor’s attention several months ago. This was followed by some tests, which included drinking the most awful chalky concoction after which I was expertly tipped flat on a cold metal table while having my innards X-ray’d. I’ve even been injecting with radioactive nuclear medicine, which I’ve been assured will not shorten my lifespan nor make me glow in the dark. Neither of these tests has revealed the great mystery of my incredible indigestion. However the doctor decided to put me on a prescription strength anti-acid, which I think has helped my case. I no longer wake up in the middle of the night with the feeling of someone’s fist forcing its way up my esophagus. But the most miraculous improvement has been my appetite and it couldn’t have returned at a better time. Thanksgiving weekend is a glutton’s wet dream come true. It’s the harvest. There is no shortage of good, fresh food. So I decided to embrace the spirit of the holiday and cook and bake for my family while up in prime harvest territory: at the cottage. Saturday’s dinner consisted of chicken stew with chickpeas, sweet and yellow potatoes and sweet onion. We had a fabulous salad of fresh lettuces on the side and not one but TWO pumpkin pies! We only polished off one of the pies, but that meant I could use the dish to bake the most scrumptious apple pie for the Thanksgiving dinner. I decided to pay homage to the slow food movement by making beer-braised beef short ribs, steamed savoy cabbage with roasted chestnuts and garlic mashed potatoes. Yes, I roasted the chestnuts and the garlic. And let’s not forget the pies that came at the end of the meal. It was one of those meals that makes you want to hibernate for the winter or put on a cable-knit sweater and cozy up by a fire. And guess what? Not a single bout of indigestion the entire weekend (you know I’m going to live to regret writing that down). Boy was I thankful this weekend, if for no other reason than I was able to enjoy a good meal with my family for the first time in months. To tell you the truth I would have been just as happy eating a peanut butter and jelly sandwich if it meant  I could eat without fear of my food revisiting me in the middle of the night. But having a good meal go down certainly doesn’t hurt.

Beer braised beef short ribs
Garlic mashed potatoes
Savoy cabbage and chestnuts
Not one, but TWO kinds of pie!

Slow Roasted Tomatoes

I just finished reading Molly Wizenberg’s A Homemade Life. Not surprisingly I devoured the book and the recipes in it. I have yet to make the chocolate cake that appears at the end of the book, or any other recipe for that matter, although I’d like to, but I did manage to make one. It’s the recipe (if you can even call it that) for slow roasted tomatoes. My mother, my sister and I bought a half bushel of roma tomatoes a few weeks back thinking we’d all take our thirds away and turn them into tomato sauce or something like that. Mine sat in the fridge pining for attention, but I just didn’t have the time or the energy to put into them. Finally one Saturday rolled around and I decided it was now or never for those tomatoes and based on my interpretation of Molly’s recipe, slow roasting them would be the simplest thing to do to them. So, I set the oven to 200 degrees, bisected the tomatoes, threw them on a cookie sheet, drizzled the appropriate amount of olive oil, sprinkled kosher salt and popped them in the oven for a full 5 hours. Out they came, slightly shriveled and sweet as can be. I brought them to my parents’ house for dinner that night and my dad oohed and awed as he ate them, along with everyone else. I single out my father because I consider him a tough customer to please when it comes to culinary achievements. He likes things simple and full of flavour and this fit the bill. Take a look at the pre-operative and post-operative tomatoes!

Roma tomatoes
Roma tomatoes
Ready for the oven
Ready for the oven
Slow roasted tomatoes

Lunching With The Ladies

Meet Arlene. A lady of many talents. DIY’er, graphic artist, designer, mother, gourmand and baker. In this particular category we are kindred spirits. For the last nine months or so, I had the pleasure of working with Arlene on a television show–she as a stylist, me as a producer. Over the course of the nine months we exchanged recipes, discussed cooking and baking methods and even had the odd “bake off.” For this, the rest of the staff was grateful. Since production of the show has wrapped, we have all been scattered like seeds to the wind, keeping in touch primarily through Facebook.  But today Arlene and I, along with Lindsay, an equally talented and fellow show stylist, joined us for a bite of lunch at my place. I provided most of the nibbles, but the topper were the perfectly tangy, sweet and just gooey enough lemon squares Arlene baked. I could have inhaled the entire pan, but that would have been unladylike of me. So I restricted myself to just one, but kept a plateful to eat after my guests had departed. Lemon squares can be finnicky. The shortbread base needs to be baked for a brief period of time before the lemon filling is poured over top. And the filling needs to be baked long enough to set, but not too long. If you overbake the squares, you’ll end up with a burnt base and hard, chewy lemon filling. And if underbaked, the filling just oozes everywhere, making an awful mess. Not the least bit enjoyable to sink your teeth into. Thankfully this was not the case as I gingerly removed the squares from the pan, which came out perfectly, well, square.


The lovely & talented Arlene


Arlene's lemon square


Lindsay, stylist extraordinnaire