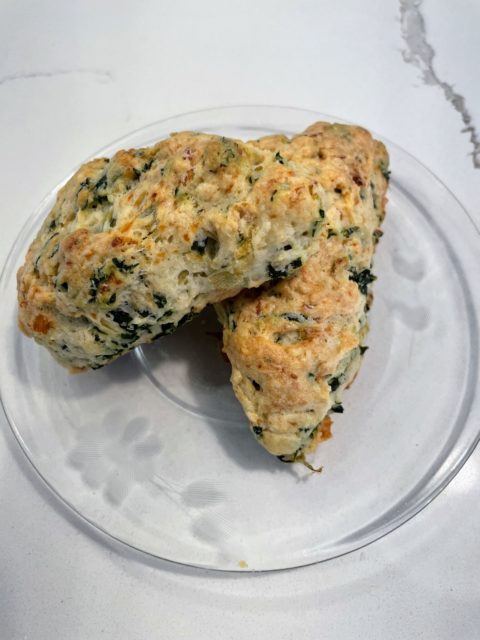
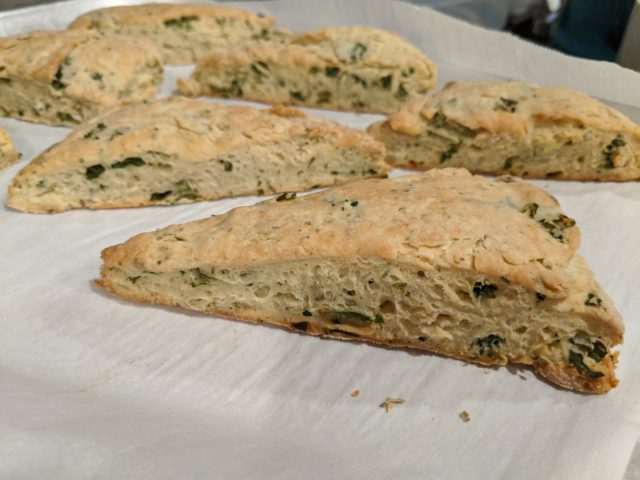
It’s Fall and that means it’s time to bake savory biscuits and pastries. Scones are in a category all their own.
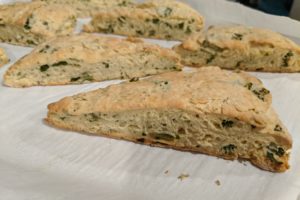
I first had this scone at Manresa Bread, a local bakery that makes some of the most outstanding sourdough breads and other yummy bakes. Unfortunately it is not always available, so I did some digging and found the recipe. I love to eat these with a bowl of soup or just on their own. The savory sharpness of the parm and the addition of kale and leeks makes me feel like I’m eating something healthy. These are light and fluffy, owing to the cake flour and the cream. Make sure not to over mix the dough. The chunks of butter also keep it from becoming “claggy” (British for thick and sticky).
KALE PARMESAN SCONES (from Manresa Bread)
2 Tablespoons olive oil
112 grams (~½ cup) sliced leek (the white part)
1 bunch Lacinato kale, ribs removed, and coarsely chopped
340 grams (2 ½ cups) cake flour
1 Tablespoon baking powder
2 teaspoons sugar
2 teaspoons salt
4 ounces (1 stick) unsalted butter, cut into ½ inch chunks
1 to 1 ½ cups of cream or milk
Grated parmesan
Instructions
Sauteé the leeks in 1 Tbsp. olive oil until they are soft, taking care not to let the leeks colour.
Remove from heat and put in a bowl to cool
Add the other Tbsp. of olive oil to the skillet and sautée the kale for about 3-4 minutes just until it begins to wilt
Remove from heat and put in a bowl to cool
Combine all the dry ingredients into the bowl of a standing mixer
Add the butter chunks and mix on low speed until the butter resembles pebbles
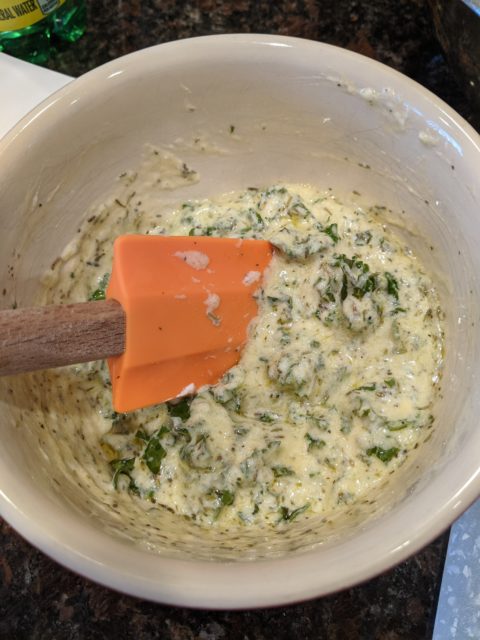
Add the kale and leeks, then the parmesan. Mix on low speed until just combined.
Add 1 cup of cream and mix on low just until the dough comes together. Add more cream if needed.
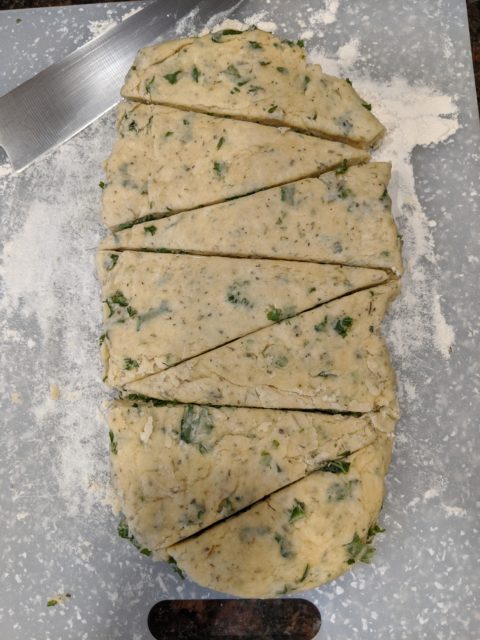
Turn the dough out onto a floured surface and form into a ball.
Then shape into a rectangle about one inch thick.
Cut into 12 triangles.
Place on a baking sheet and bake at 350 degrees for approximately 20 to 25 minutes until lightly golden on the top and bottom.
Remember when we were allowed to wander freely, casually stopping in at a local coffee shop for a hot drink, a bookstore to browse the new releases or a bakery to grab a yummy treat? Wait! That was just last week, right?
I used to indulge in two treats at Manresa Bread, usually on a Sunday when I was visiting the Campbell Farmers’ Market. I could justify the astronomical price for their wholewheat chocolate walnut cookie or their kale parm scone because I rarely indulge (I normally bake everything myself). Now that I won’t, ney CAN’T attend the farmers’ market, and also because I felt guilty dropping that kind of coin on a cookie or scone, I am baking these at home for ALL to enjoy. And now you can too! The recipe for these scones was originally published in the San Francisco Chronicle when they did a feature on Manresa’s head baker, Stephanie Prida.
The recipe calls for cake flour and cream. If you don’t have those ingredients, the recipe works just as well with all purpose flour and milk. It also calls for one bunch of lacinato kale. I don’t know what that is. And neither do you. But if you do, great! If you don’t, just use whatever kale you have access to. If you don’t have any kale, you can also substitute it with another green, like spinach or chard–just make sure you wring out any excess water from your leafy green or the scones will be soggy. Another substitution might be the leeks. If you don’t have any, try shallots or onions. Given the restrictions of our movements out in public these days, you might not be able to or want to run out to the supermarket to grab everything you need for these scones, so just improvise.
Kale Parmesan Scone Recipe from Manresa Bread
2 Tablespoons olive oil
112 grams (~½ cup) sliced leek (the white part)
1 bunch Lacinato kale, ribs removed, and coarsely chopped
340 grams (2 ½ cups) cake flour
1 Tablespoon baking powder
2 teaspoons sugar
2 teaspoons salt
4 ounces (1 stick) unsalted butter, cut into ½ inch chunks
1 to 1 ½ cups of cream or milk
Grated parmesan (~1/2 a cup)
Instructions
Sautee the leeks in 1 Tbsp. olive oil until they are soft, taking care not to let the leeks colour.
Remove from heat and put in a bowl to cool
Add the other Tbsp. of olive oil to the skillet and sautée the kale for about 3-4 minutes just until it begins to wilt
Remove from heat and put in a bowl to cool
Combine all the dry ingredients into the bowl of a standing mixer
Add the butter chunks and mix on low speed until the butter resembles pebbles
Add the kale and leeks, then the parmesan. Mix on low speed until just combined.
Add 1 cup of cream and mix on low just until the dough comes together. Add more cream if needed.
Turn the dough out onto a floured surface and form into a ball.
Then shape into a rectangle about one inch thick.
Cut into 12 triangles.
Place on a baking sheet and bake at 350 degrees for approximately 20 to 25 minutes until lightly golden on the top and bottom.
Dorin’s modifications:
I use milk instead of cream
There are no measurements for the parmesan so I put in about 1/2 a cup of loosely packed grated parmesan. It depends on how cheesy you like your scones
I have made these without the leeks when I haven’t had them
I have added raw kale to the dough and it still tasted great
I flew back East for the holidays and discovered some very valuable items in my mother’s freezer: Montmorency cherries.
You see, I can’t find tart or sour cherries anywhere on the Left coast. They don’t grow ’em, they don’t sell ’em. They have sweet cherries. Lots of ’em. But no sour cherries. My grandmother used to make a sour cherry pie for dessert on Friday nights. She’d bake it in a brown glass tart pan, that now sits in my kitchen cupboard. She’d make something called a “Mazola No-Roll Pastry,” which was dead simple and always had the perfect bite to it and a smidge of salt, that was the perfect counterpoint to the sweetened sour cherry filling. I still make it and biting into that pie brings back all sorts of nostalgic memories for me.
When I lived back East, I used to buy a huge bucket of pitted cherries from the supermarket for about 20 bucks. I would drain them and measure out enough cherries for a pie, put them in a plastic freezer bag and have enough to outlast the short cherry season in Ontario. I did that this past summer, hence why there were some in my mom’s freezer.
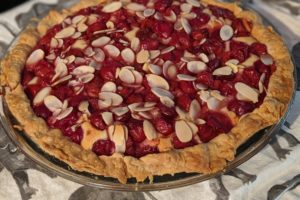
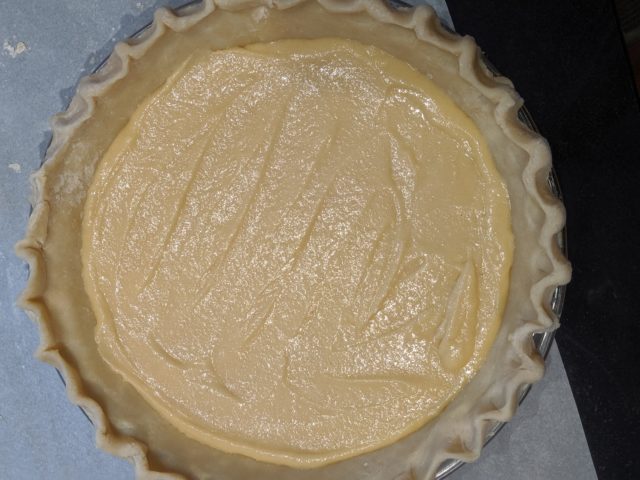
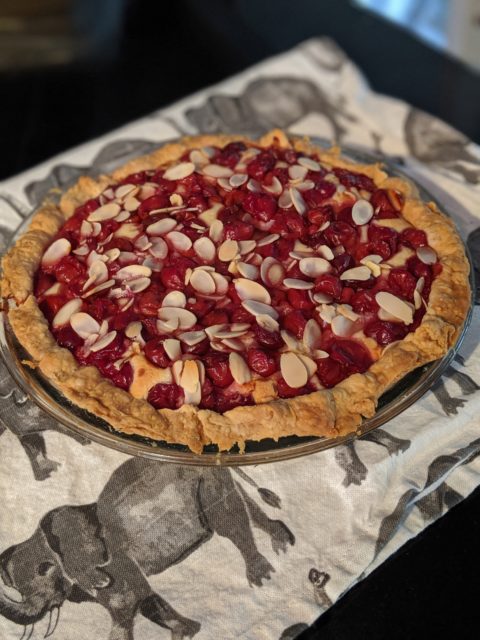
Instead of doing the traditional pie, I decided to change things up and make a batch of frangipane cream for the pie filling, and then I poured the cherries on top and finished it with slivered almonds.
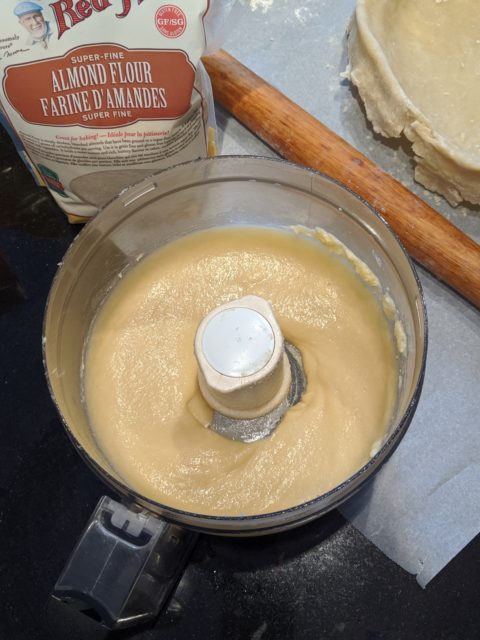
Frangipane is of French origin. It is more of a paste than a pie filling, made of almond flour, butter, sugar and eggs and a hit of almond extract. I just think of it as the filling you find in almond croissants. It’s definitely not marzipan. It was quite a popular choice on the Great British Baking Show and I was curious what all the fuss was about, so that’s why I decided to try baking with it.
Using a food processor was the fastest way to make frangipane creamThat pie shell looked great! (before it was baked)
I don’t mind it, but I’m not sure it will become my go to filling. It has a very distinct flavour, which is not to everyone’s liking.
I think it baked up beautifully and looked pretty good. My only criticism (which is entirely cosmetic), is that my pie crust shrank too much and so I didn’t get the nice fluted edge I was hoping for.
Sour Cherry and Frangipane Pie
But it must have tasted good, because there wasn’t any left at the end of the evening…and people were asking for more!
Time for a break from making finnicky desserts and time for some down-to-earth comfort cookies. I fished out a recipe for these cookies that I got from my long time neighbour, Kelly. I remember she brought a freshly baked batch over to our house and they were gone in no time flat.
I can’t remember the last time I made these, probably because the kids can’t take these in their school lunches (or rather, I won’t let them–there are no laws here in California that prevent kids from bringing peanut and nut products to school, unlike in Ontario where Sabrina’s Law exists).
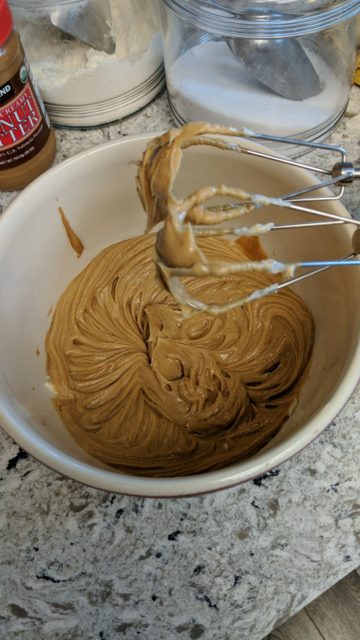
Some would argue these cookies bake best with processed peanut butter like Kraft or Skippy, but I only buy natural peanut butter. Just peanuts!
The butter mixed with the peanut butter was so creamy when I blended it together with the hand mixer.
Creamy peanut butter and unsalted butter
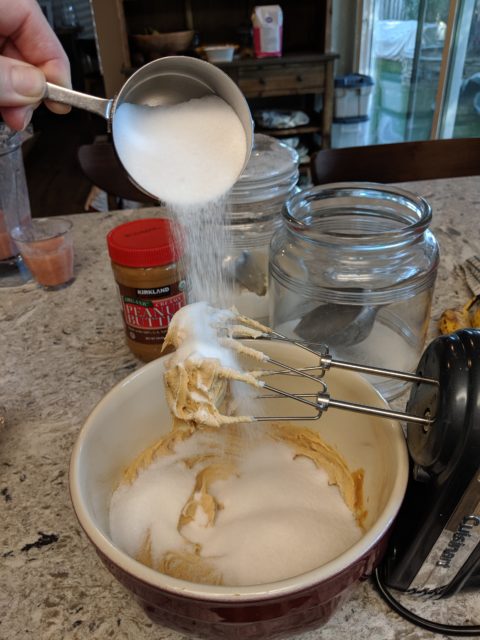
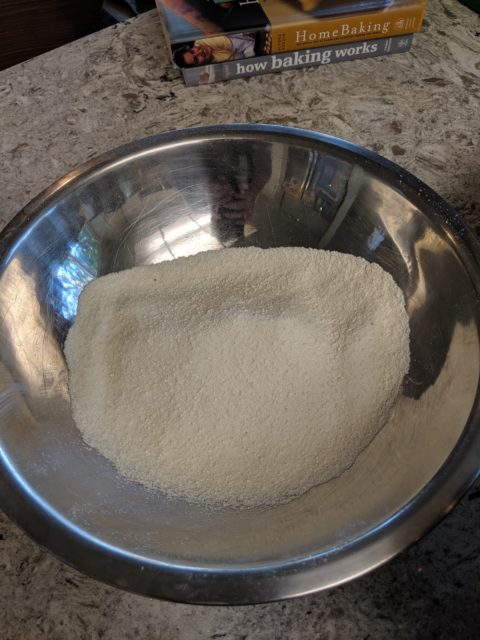
Then I added the requisite sugar, eggs and flour and voila! beautiful cookie batter.
Yes, sugar
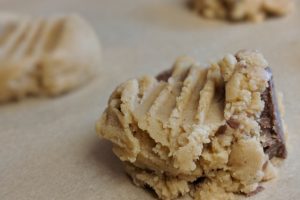
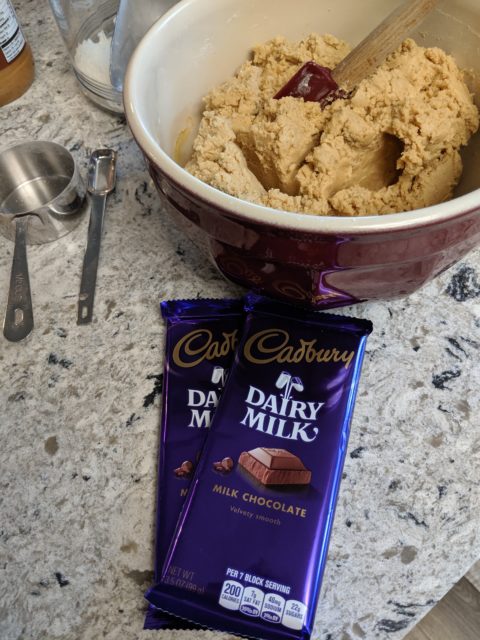
I found a couple of Dairy Milk bars in the cupboard and decided to crush them up and throw them in the batter instead of using chipits and I’m glad I did.
Chocolate + peanut butter= sheer perfection
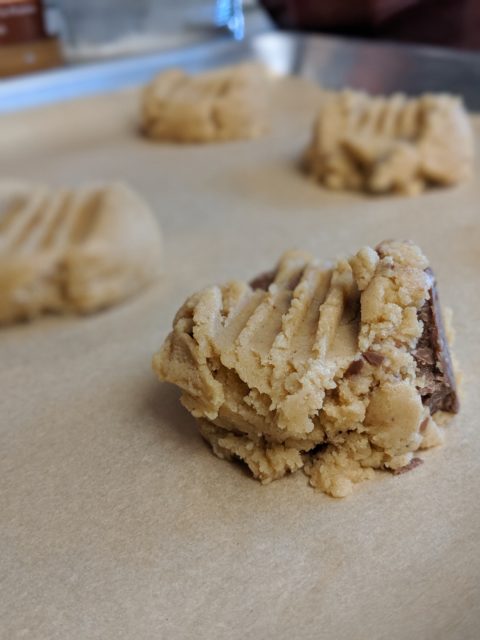
Just before baking, I used the back of a fork to press the requisite hash marks into each cookie. Because, peanut butter cookies. Right?
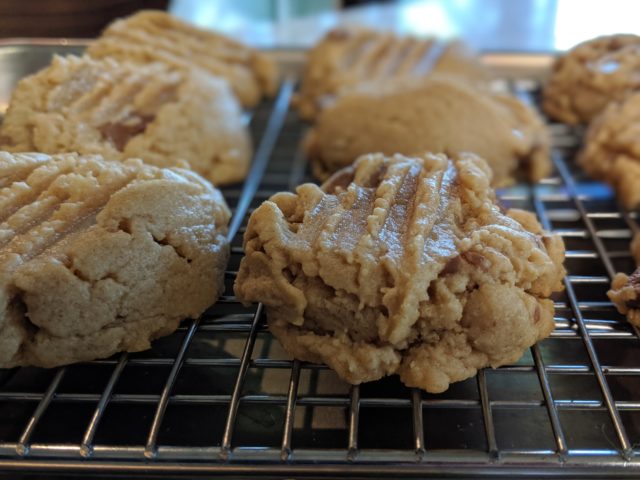
The resulting cookies were so creamy and delicious, and once again, they disappeared within a few days. I think the milk chocolate chunks also made a big difference.
These were quick and easy to make and didn’t require much, if any, skill or precision. So go make some!!!
Fork tine marks are required in peanut butter cookiesLet the cookies completely on a wire rack–if you can resist!
Kelly’s Peanut Butter Cookies
1 Cup peanut butter (I like to use all natural smooth PB)
1 Cup unsalted butter, softened
2 eggs
1 Cup granulated sugar
1/2 Cup brown sugar
1 tsp baking powder
2 1/2 Cups, all purpose flour (or you can do half whole wheat flour for a slightly denser cookie)
2 bars of your favourite chocolate bar (I used Dairy Milk), crushed up into chunks
Instructions
Preheat oven to 350 degrees
Blend peanut butter and butter together in a standing mixer or with a hand mixer until completely incorporated
Add eggs and blend followed by sugars
Add baking powder and flour(s) and blend until ingredients are incorporated.
Mix in chocolate chunks until evenly distributed
Scoop 1″ balls of dough onto parchment-lined cookie sheet
Take the back of a fork and press firmly down until fork tine marks appear in flattened cookie (but not too hard!)
Bake for ~10 minutes until cookies are lightly browned
Transfer to a wire rack to cool completely (if you can wait that long!)
So if you thought I had a death wish when I decided to tackle puff pastry, think again. Pastry, shmastry! Puff pastry was a cake walk compared to making French macarons for the first time. Now I know why Laduree and Nadege charge a pretty penny for these dainty sweets.
To be honest, I didn’t spend a ton of time researching this recipe and maybe my results are proof that I should have spent more time studying before breaking out the almond flour. But I had six egg whites in the fridge after making those yummy Portuguese custard tarts. And I think I was feeling a little overconfident after making those divine tarts, nay, impatient to prove I could succeed again at making a *Patchka* recipe.
So here’s the deal with French macarons: historians tell a story of their origins in the 18th century around the time of the French revolution. Nuns who were seeking asylum made the meringue-like biscuits to sell in order to pay for their lodging at the local convent (there seems to be a pattern here with members of the cloth having a knack for baking–Portuguese custard tarts, anyone???). However, there are many other versions of the dessert that apparently date back as far as the 8th century.
And the name alone actually comes from the Italian “maccherone,” which means fine dough. There are accounts of future Queen of France, Catherine de Medici bringing the recipe over from Italy in the 1500’s.
The macarons we think of today–the two round biscuits sandwiched with a sweet filling in the middle–didn’t gain popularity until the 1930’s.
I watched an excellent tutorial by John, over at the Preppy Kitchen. He is meticulous and detailed in his explanation of the what, how and why of making macarons. There is even a term called “macronage” when it comes to incorporating the almond flour and icing sugar mixture with the stiffened egg whites. He is also not above pointing out that it took him many attempts before he got a decent batch of the cookies.
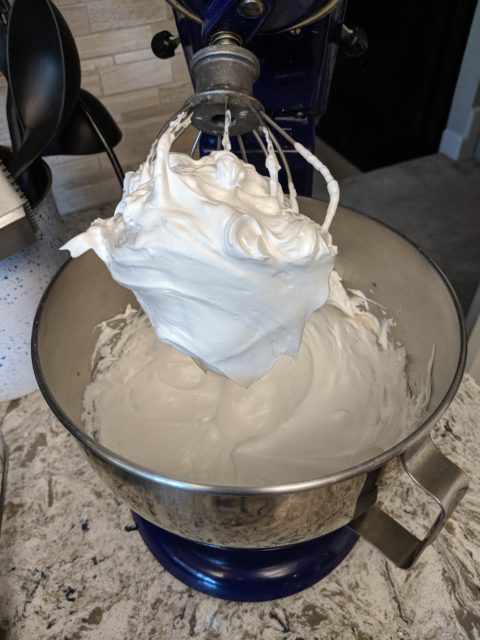
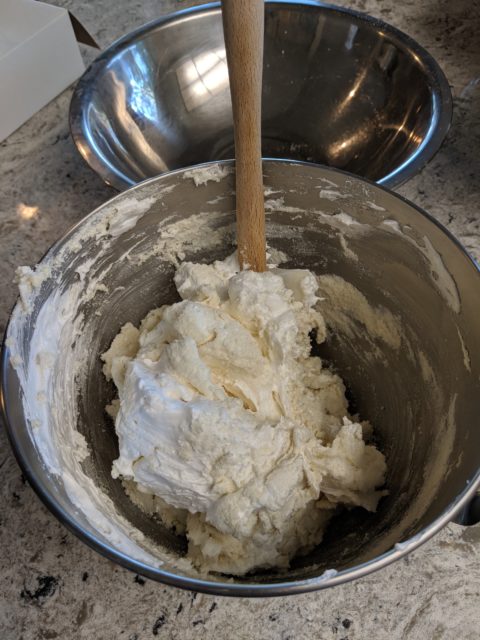
Super fine almond flour and icing sugar are sifted not once, not twice, but three times!Egg whites are whipped to a marshmallow-like consistencyThe delicate dance of “macronage” is underway.
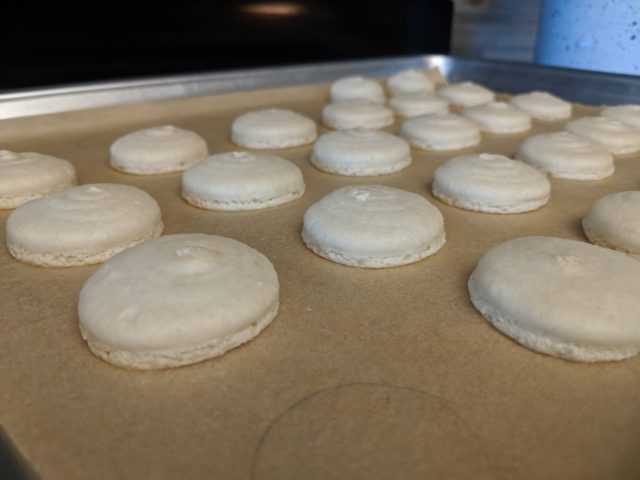
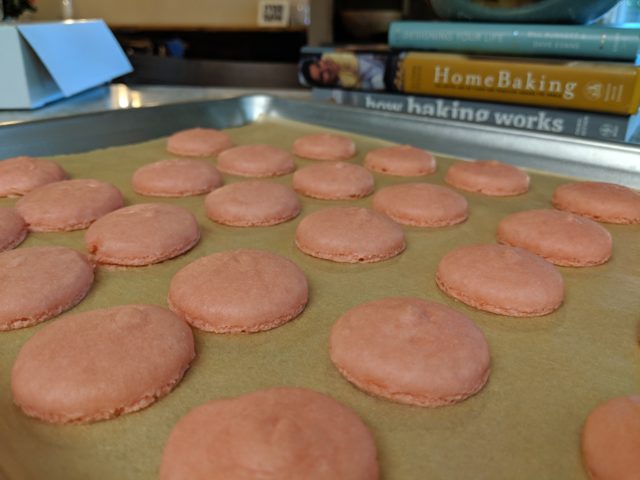
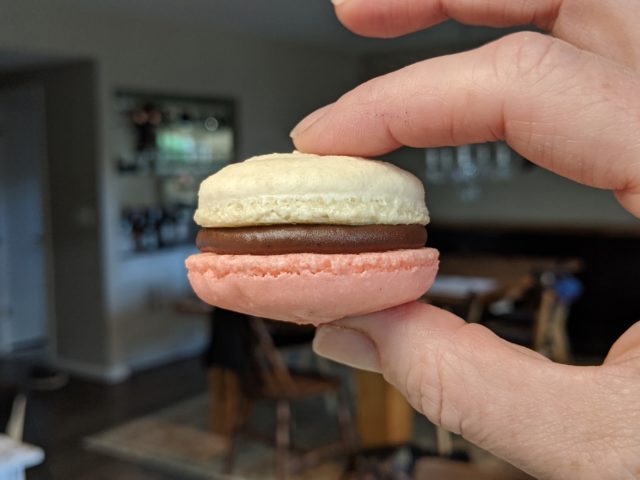
Although I followed his instructions religiously, my biscuits did not come out with a nice glossy finish or crispy exterior as I had hoped. I blame the oven entirely. They taste delicious even if they look a little bit withered. And they are nice and fluffy and chewy.
The results of my first bake
Oh, my dull withered macarons…
I made a simple chocolate ganache for the filling. Next time I think I’ll try a caramel filling or french buttercream. Or maybe I’ll use some homemade jam!
Kind of looks like a Neopolitan cookie, doesn’t it?
All these ideas have bolstered my resolve to attempt the recipe again. Just not tomorrow. I need to recover from Round One.
My first batch of vanilla macarons with chocolate ganache filling
This post has been a long time coming…13 years to be exact! Although I didn’t know it thirteen years ago.
My oldest had his Bar Mitzvah just over a month ago and I feel like I’ve just recovered from the big event.
He did an amazing job reading from the Torah, giving his speech to our guests, and maintaining his confidence and composure the entire day. He really shone like a star that day and was deserving of all the accolades and attention.
My job was to set the scene for our guests after the pomp and circumstance and for that I spent many months planning, plotting, “pinning” and preparing. There were so many details and so many checklists, but here, I will give you a brief glimpse into the celebration that followed the ceremony.
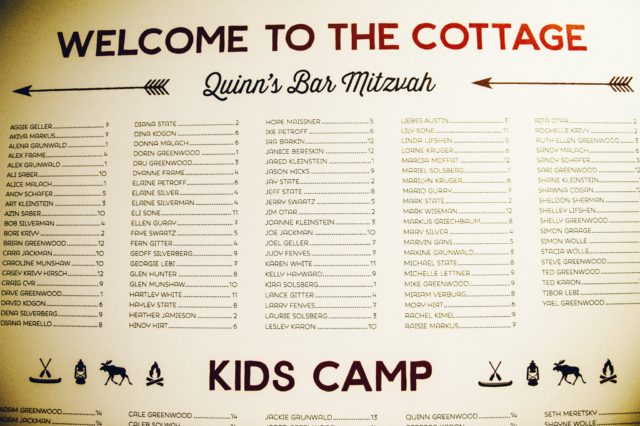
Our brunch began by welcoming our guests to “the cottage.”
Welcome to the Cottage This was the seating chart for the luncheon
I hired a graphic designer, gave her the guest list in a spread sheet with the table assignments along with some suggested fonts and icons and the dimensions for the foam core board. She was amazing to work with and had the poster delivered right to my front door. We simply mounted the board on an easel right inside the entrance to the reception room.
As people wandered in and found their tables, there was a slide show playing to music projected on to a drop cloth that I had hung on the wall, with patio lights framing it. Â The “screen” was flanked by red plastic Muskoka chairs that were draped with wool camp blankets and throw pillows with wildlife imagery such as owls, deer and moose.
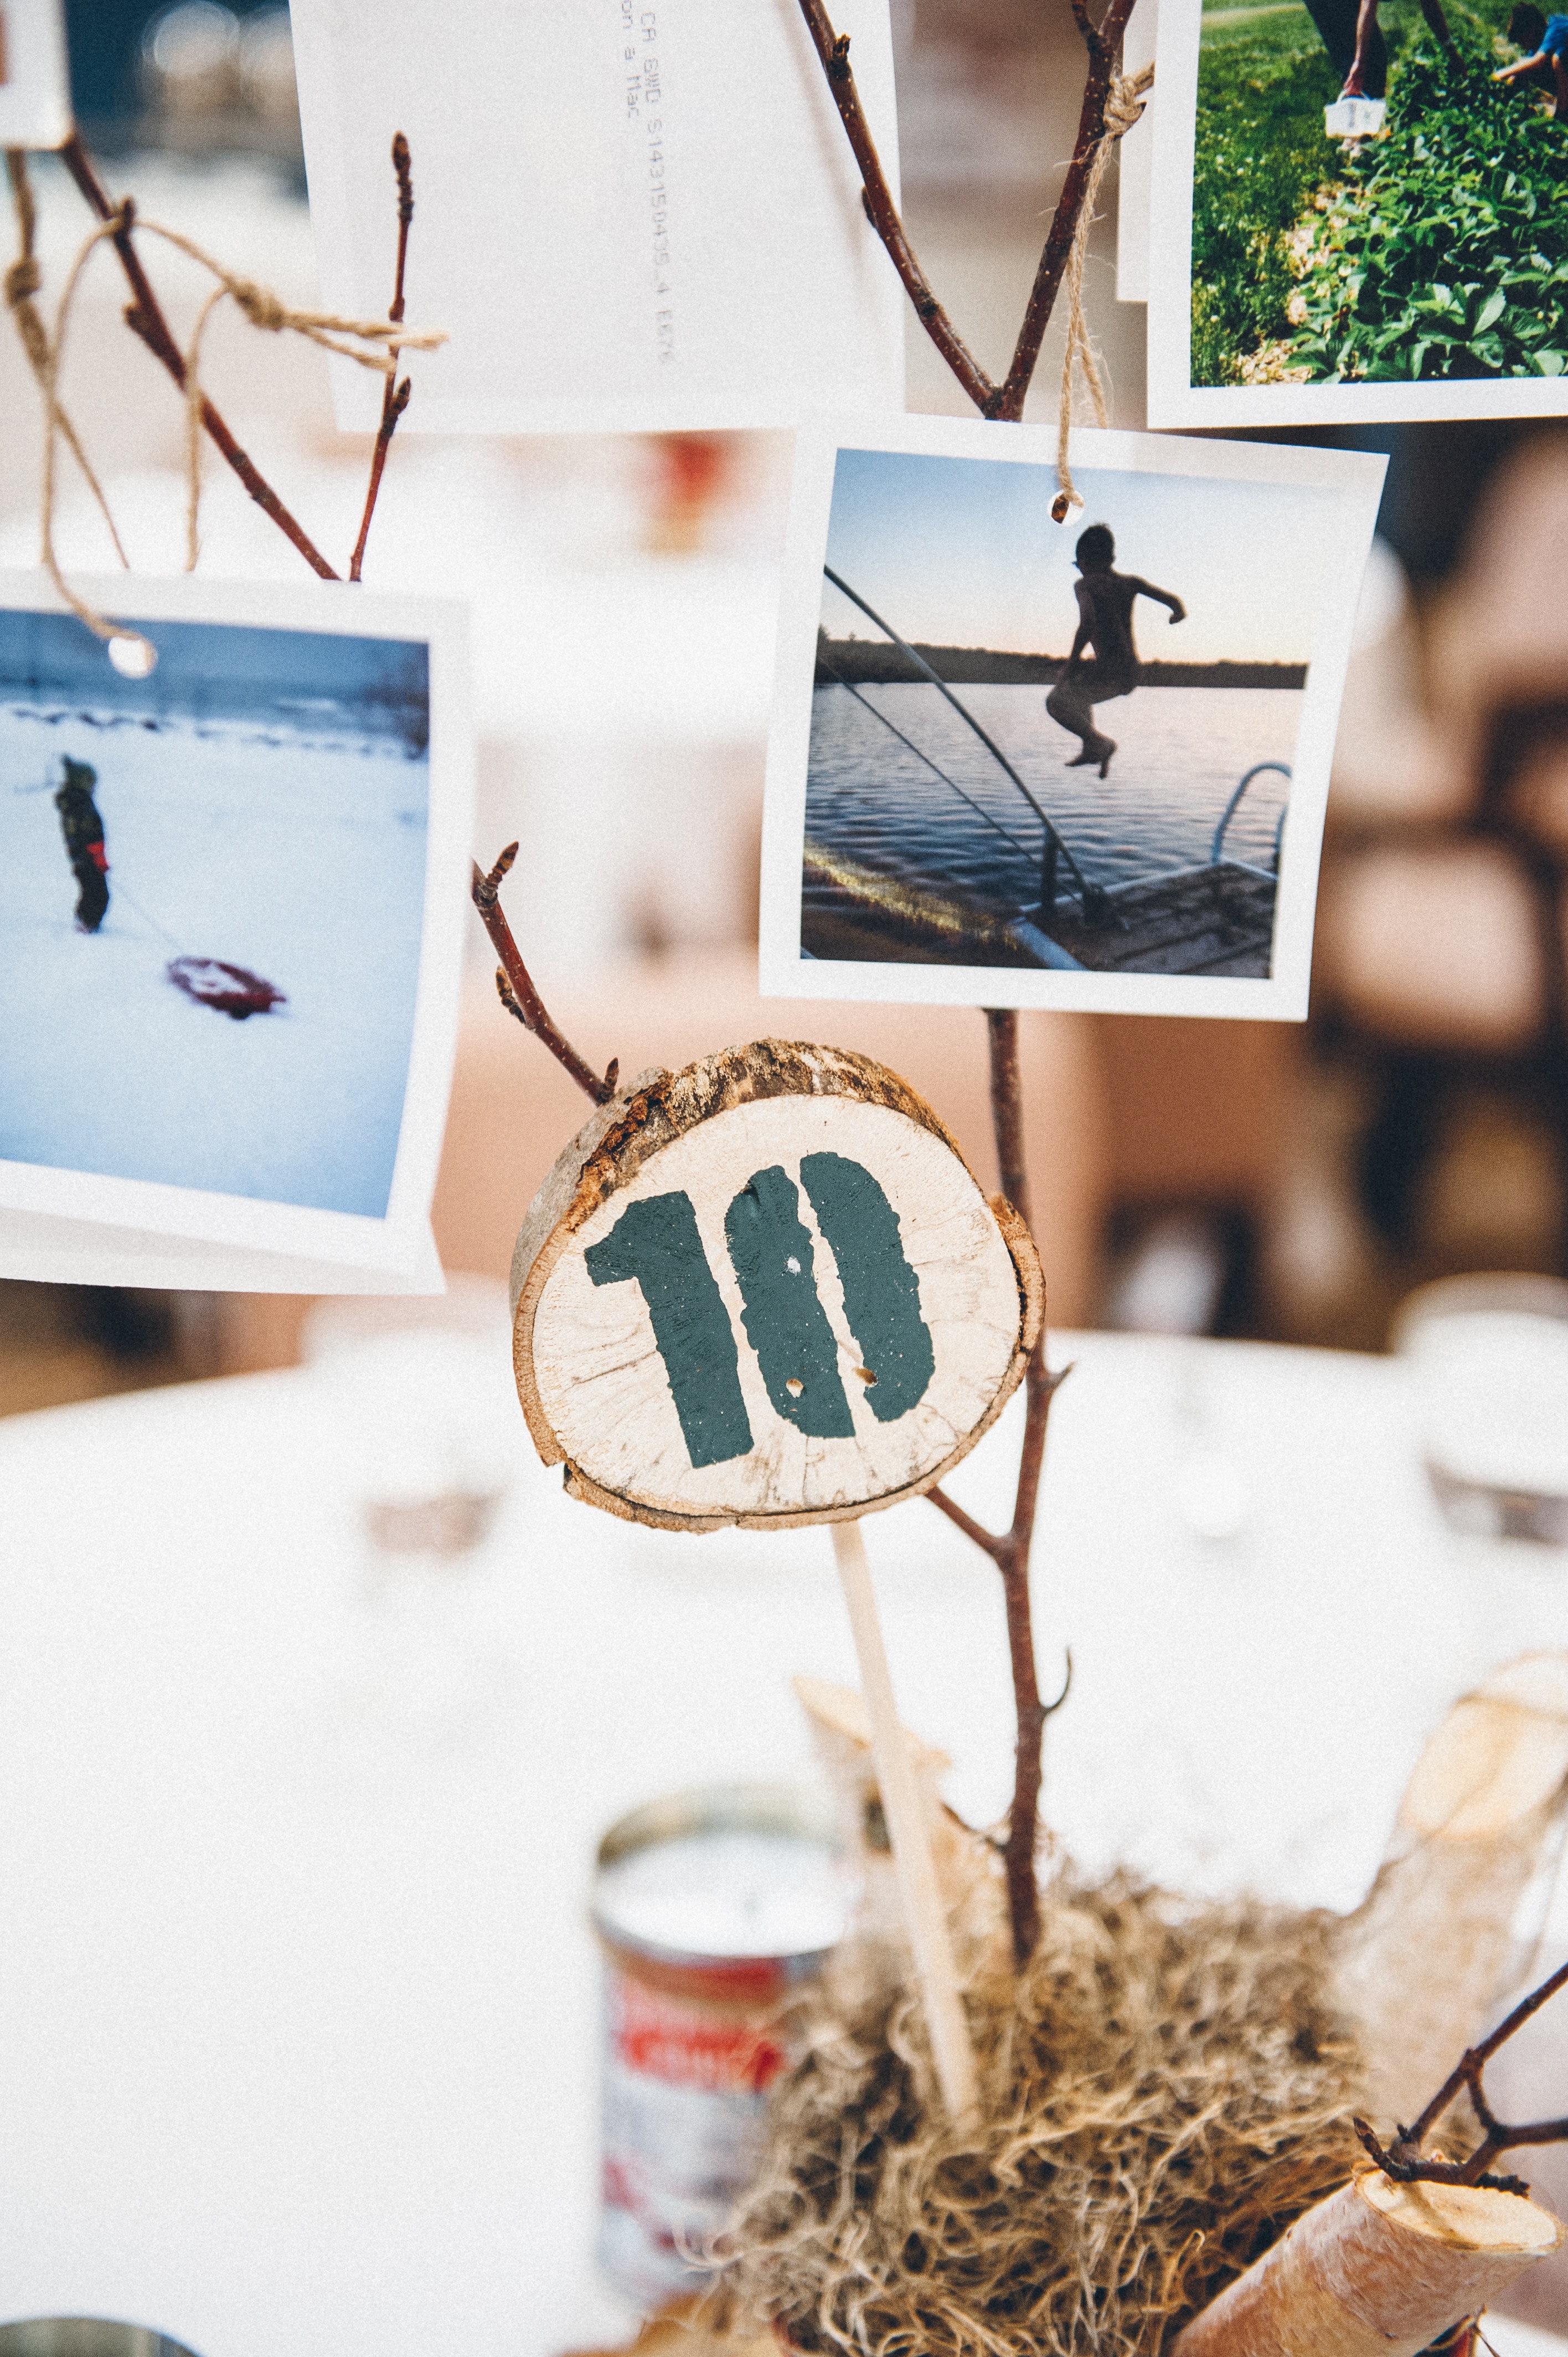
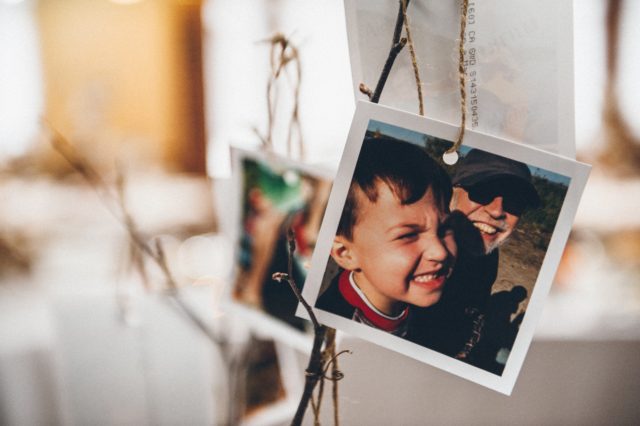
All the photos in the slide show were of the family at various family cottages in both summer and winter. Putting together that slide show was a labour of love. I also printed all the photos on to 4″ x 4″ paper, which were used as part of the centrepieces.
Each photo from the slide show was part of the centrepieces
My mother, my husband and I did an assembly line, punching holes into each photo and tying jute twine through the holes. These photos were then hung on the young birch branches in the centrepieces.
Speaking of the centrepieces–these were probably the cheapest DIY centrepieces ever and yet the most personal. I got little red socker plant pots at Ikea–there was a lot of red in the decor because that is my son’s favourite colour–filled them with pea gravel and off cuts of birch branches from my girlfriend’s cottage in North Bay, and the young birch branches were from my mom’s cottage on Georgian Bay.
We stood the pots on round wood “coins” that my husband cut with his chainsaw from fallen trees in the ravine in our neighbourhood. I just had to schlep them all to the car!
And the final touch were the rocks around the bottom of the pot, which were collected by me and my son from the harbour near my mom’s cottage.
So I think all told, we spent about $5 on each centrepiece and the biggest expense was the printing of the photographs.
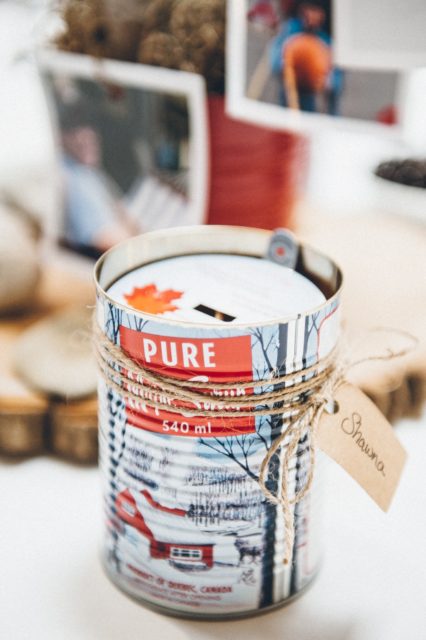
The additional expense came with the guest keepsakes that I put on each table. These were maple syrup candles in tins. They certainly didn’t come cheap, but I thought it was important to give guests a small memento from the day as a thank you from us.
Each guest received a maple syrup candle as a memento
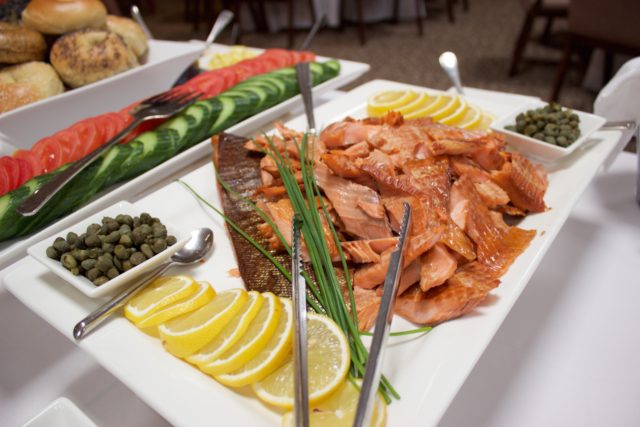
The brunch was delicious, catered by L-Eat. Niki and Tony did a fabulous job and the presentation of the food was simple and elegant. We made sure everything that was served were things we would typically eat for brunch: french toast with maple syrup, quiche, bagels with all the fixings, yogurt with granola and berries, and as a special treat we arranged to have smoked trout from Kolapore Springs trout farm up near my parents’ cottage.
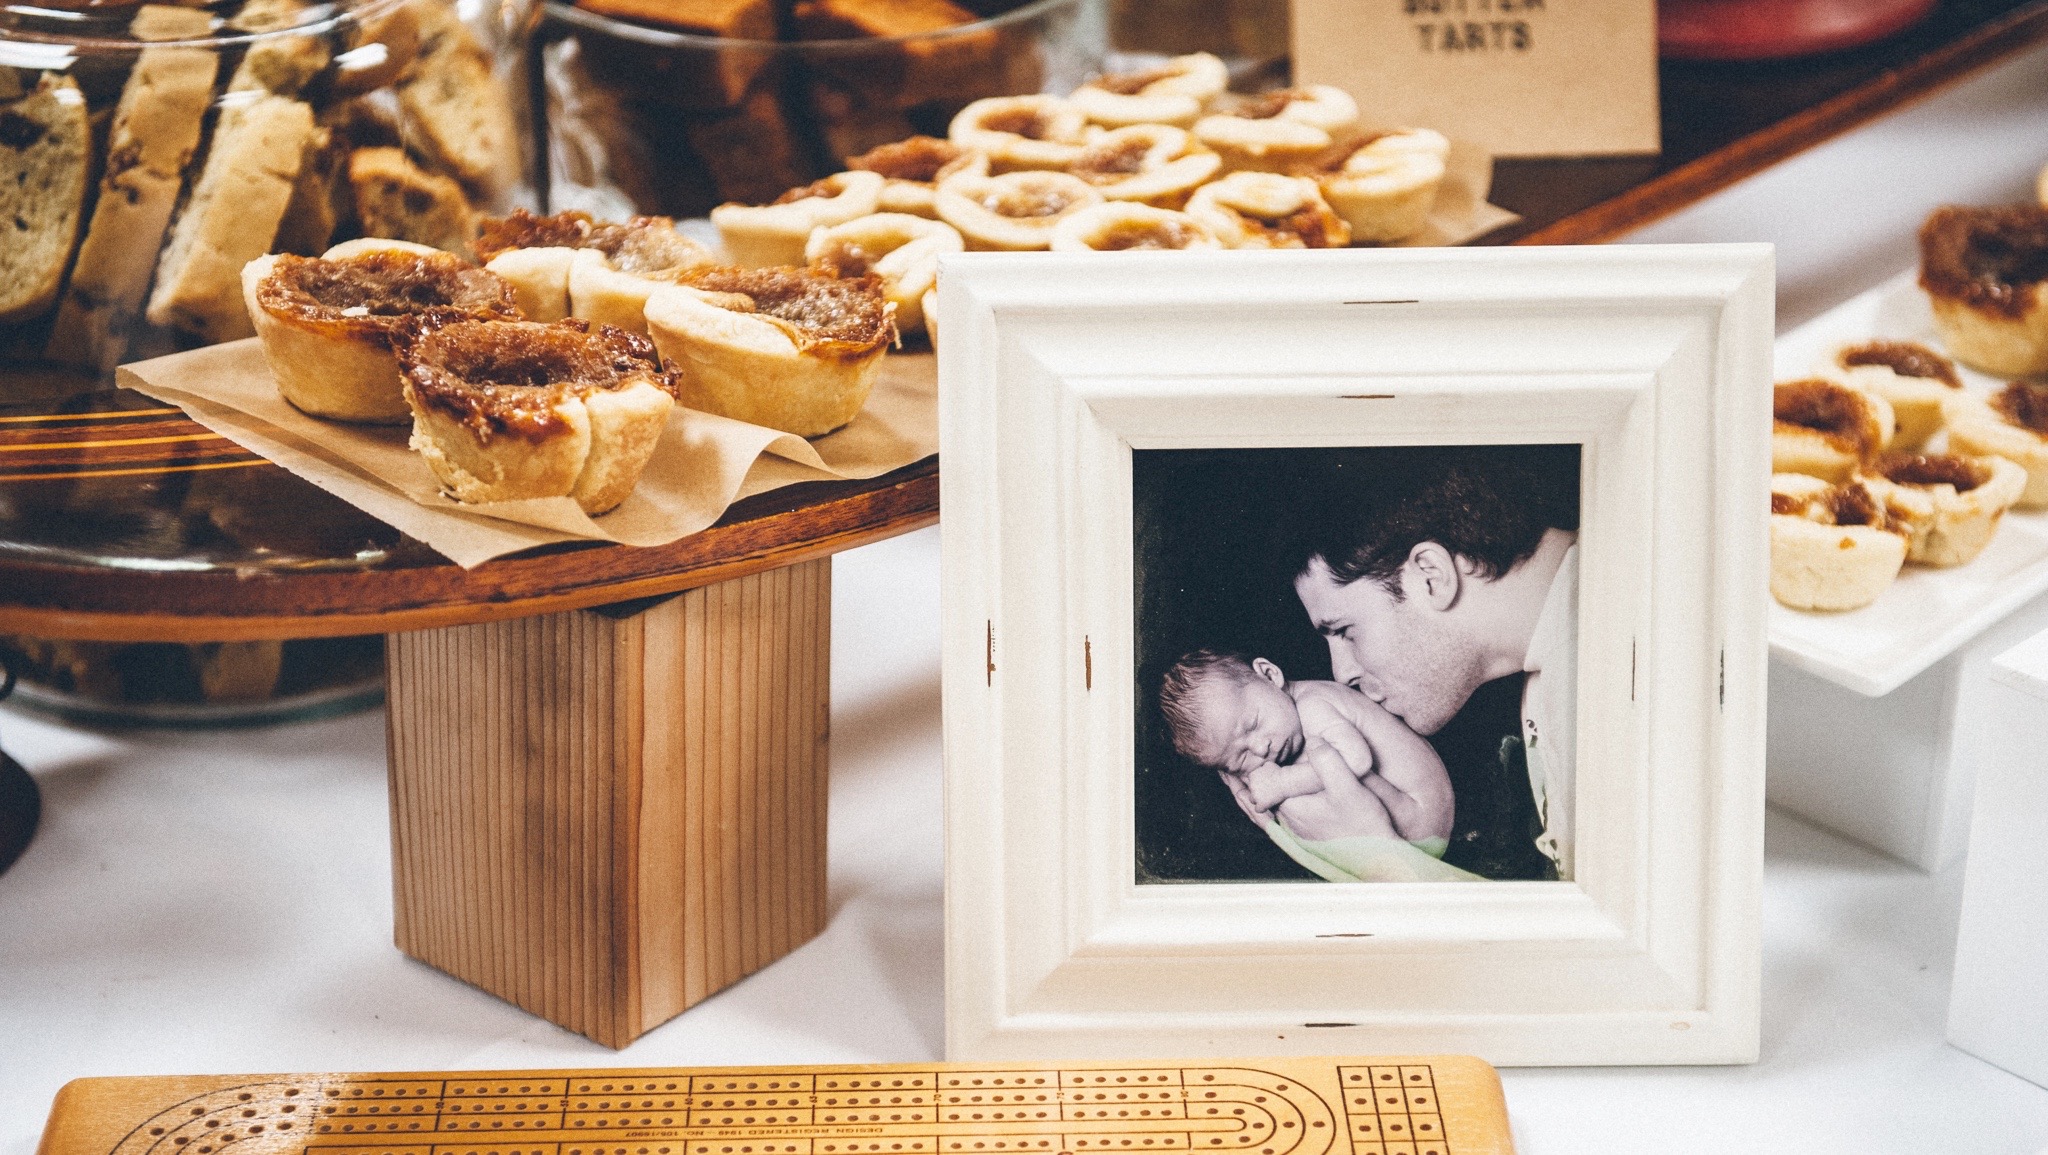
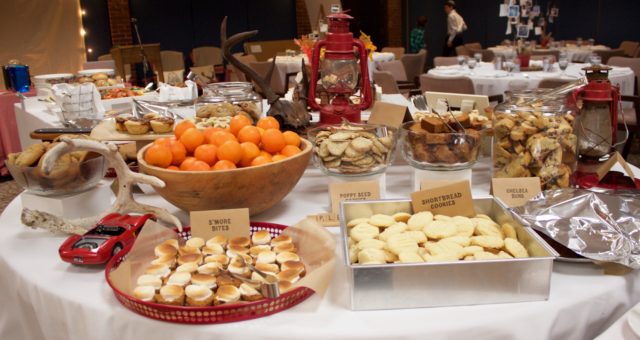
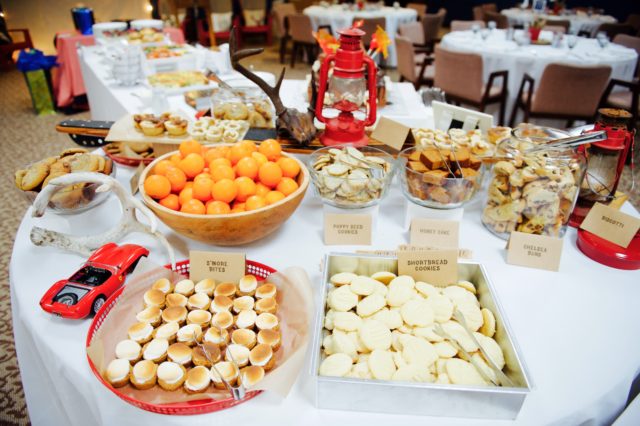
But the best part of brunch was the dessert table! This is where I truly got to showcase my baking skills, with the help of my mom, sister and mother-in-law. First, I decorated the table with objects that represented my son and the cottage–Scrabble pieces that said “Help Yourself”, antlers, a red model sports car, an old cribbage board, a vintage waterski, red oil lanterns, and a photo of my husband holding our son as a newborn.
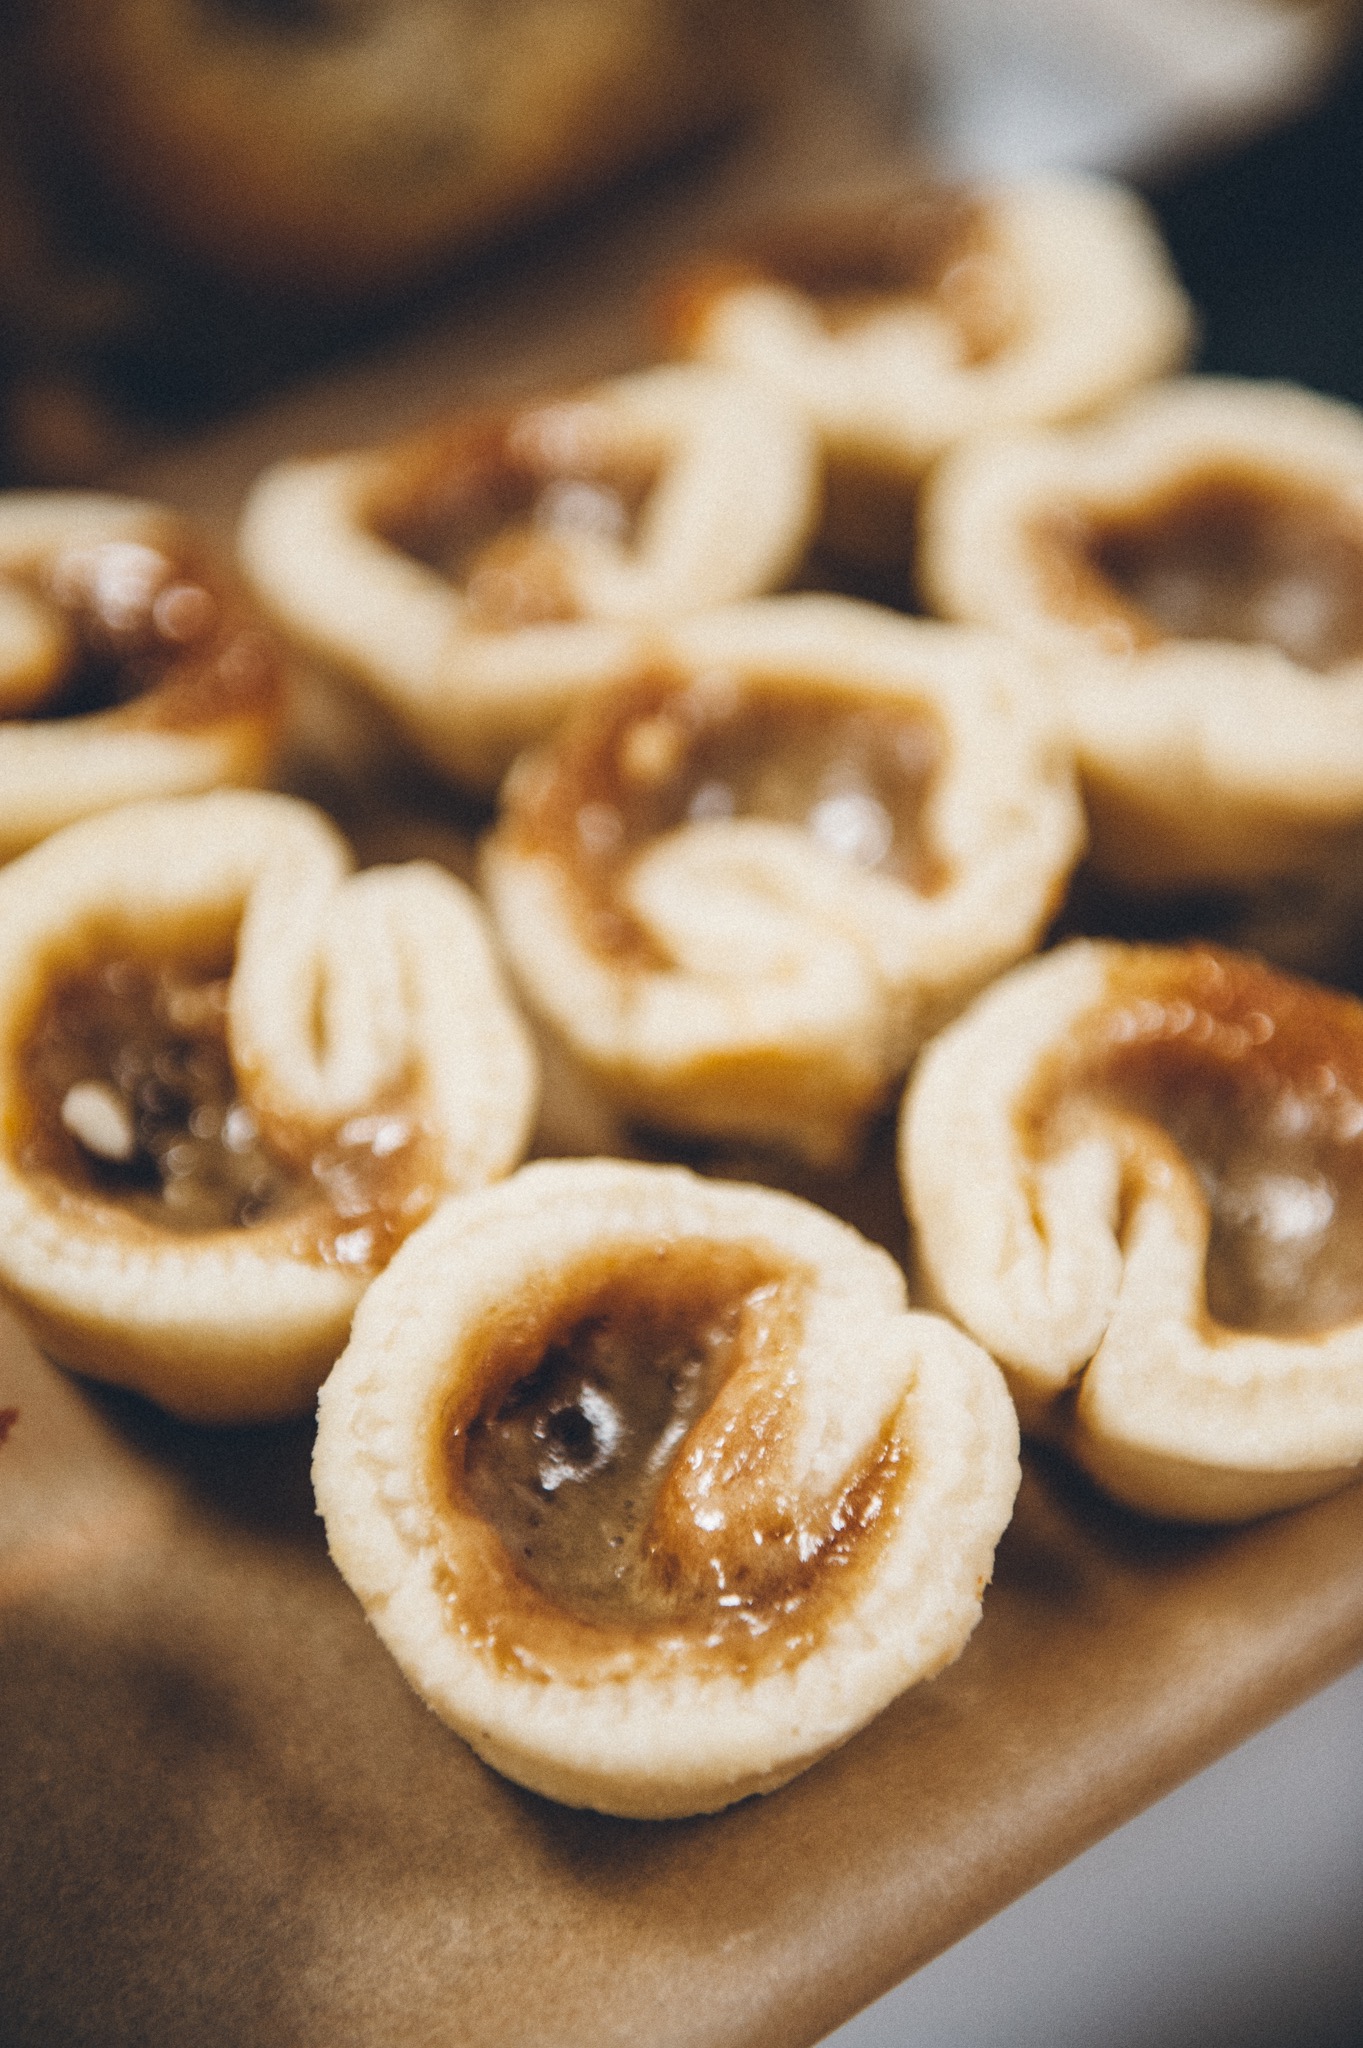
All the baked good were displayed on red tin trays, big glass cookie jars with red lids, even the waterski was used to display the homemade butter tarts.
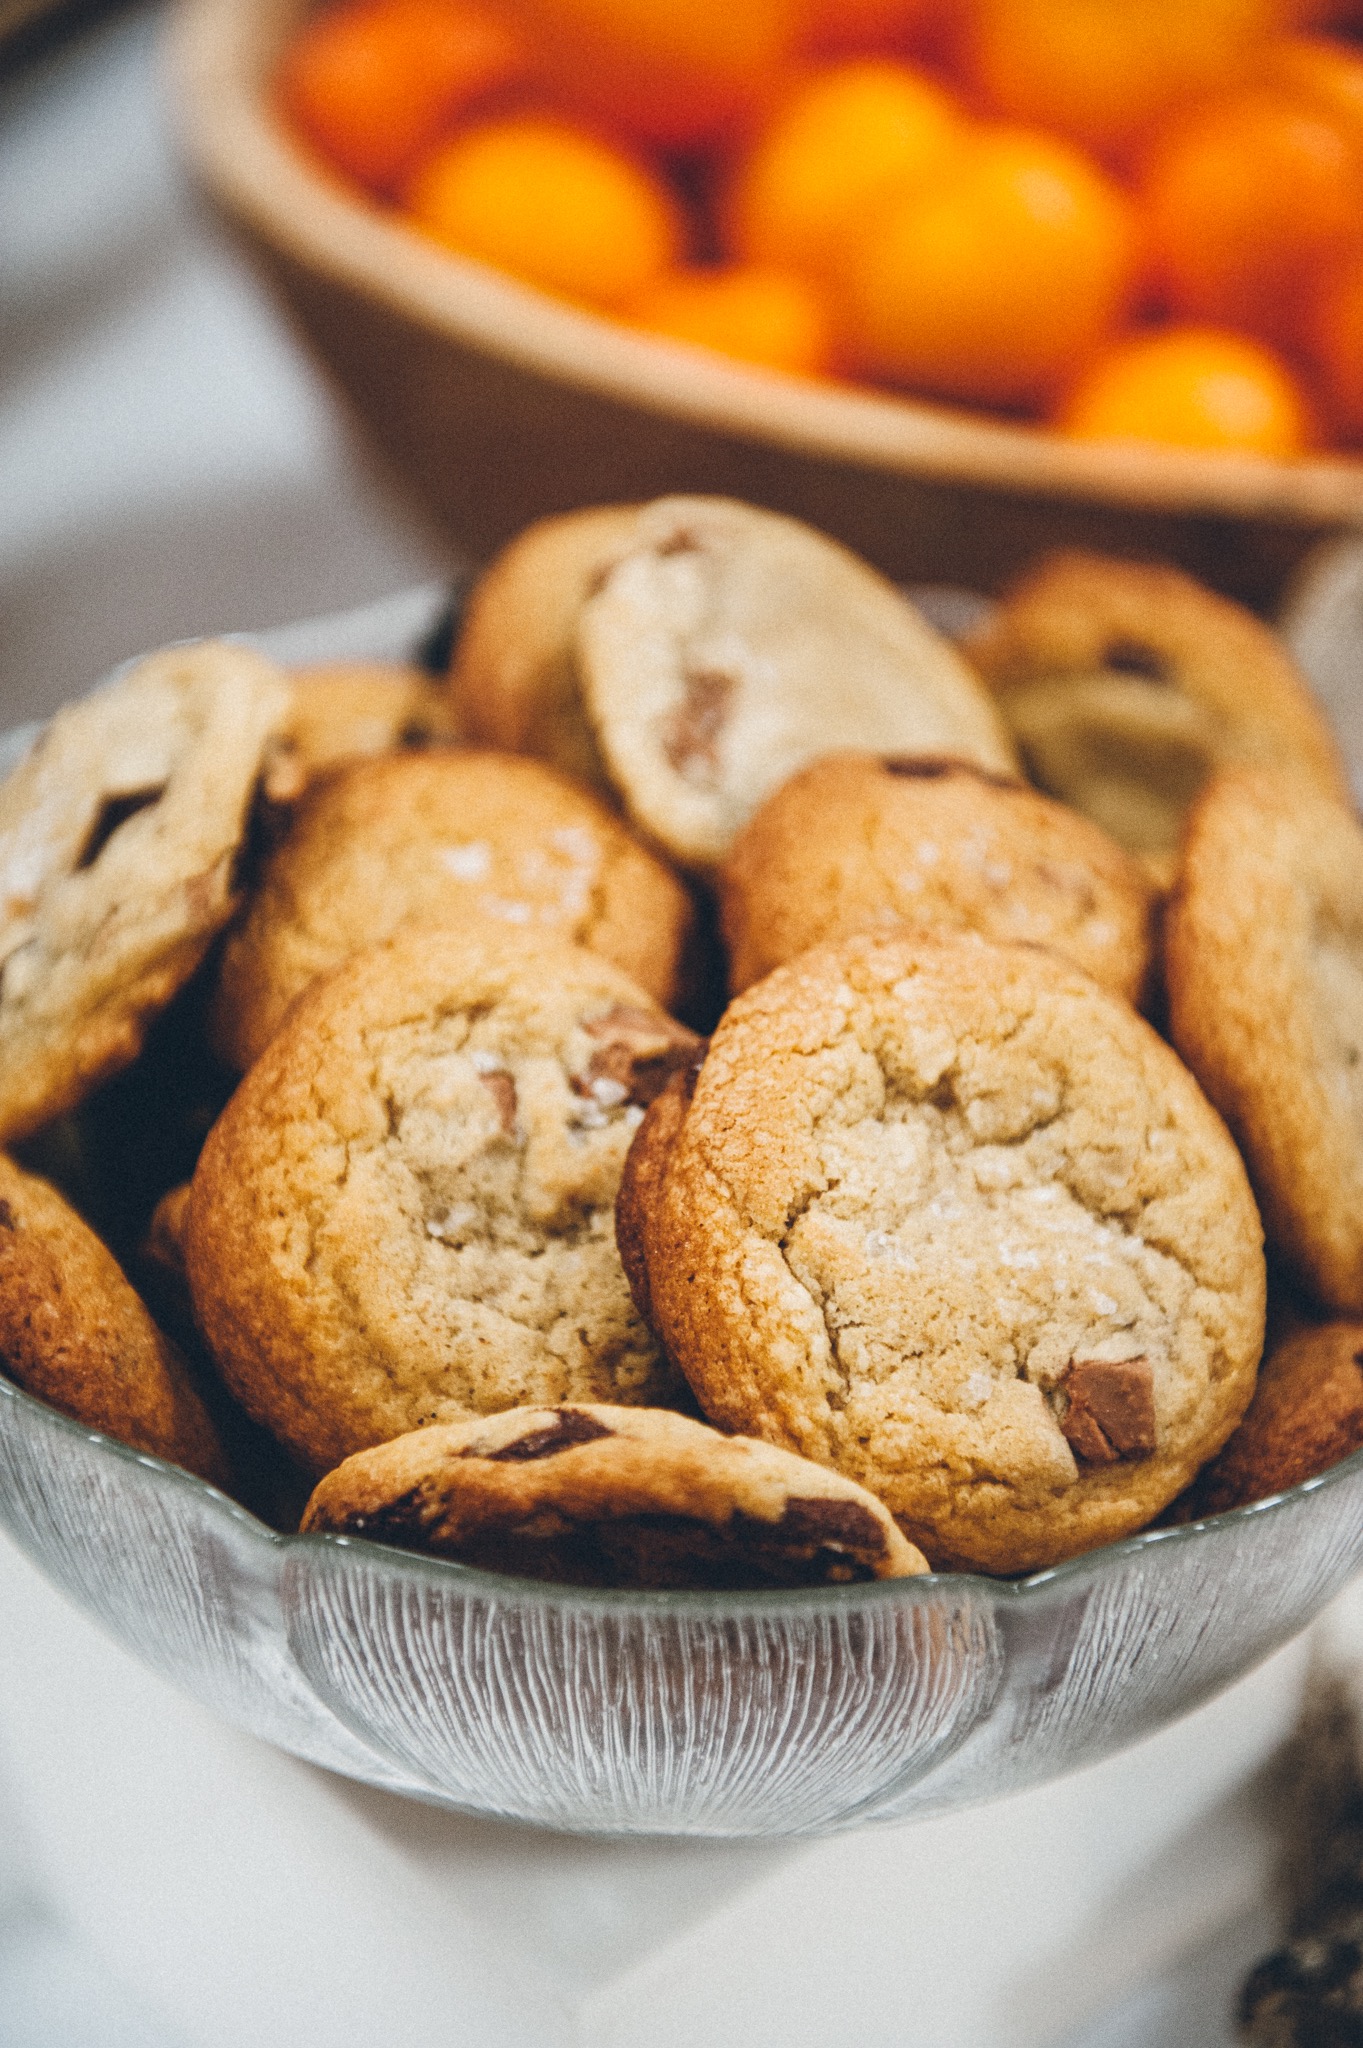
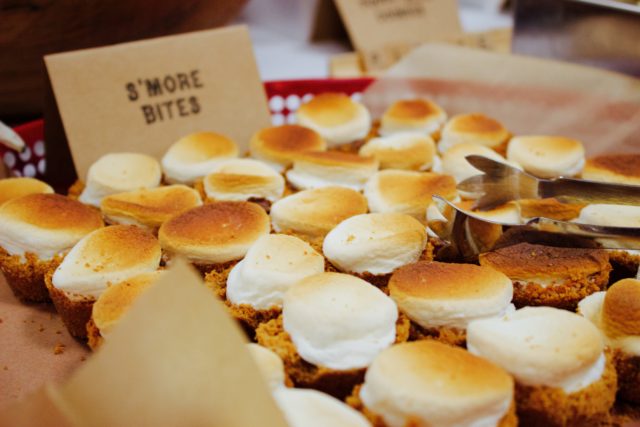
There were homemade salted chocolate chunk cookies, s’mores bites, butter tarts, honey cake, shortbreads, poppy seed cookies, ginger cookies and also chelsea buns from the Thornbury bakery (the only thing I didn’t bake!).
The Dessert Table
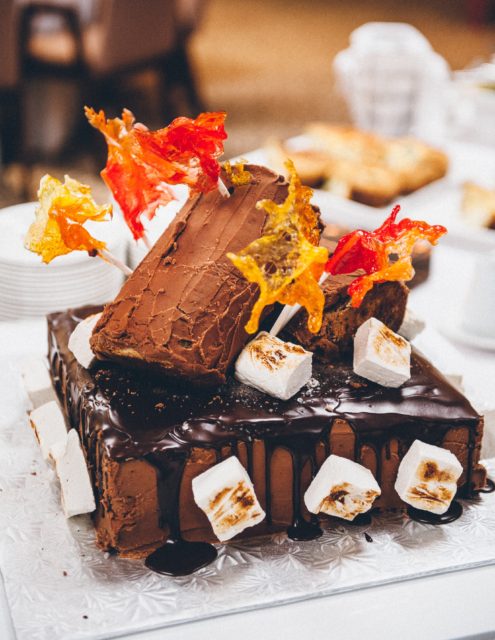
It wouldn’t be a celebration without a cake, right? Of course I baked a cake! It’s the giant, incredibly chocolatey cake recipe from Deb Perlman’s Smitten Kitchen. It’s the same cake I baked for my parents’ 40th wedding anniversary, except this time I made marshmallows, charred them and put them on the cake. I also made banana chocolate chip cake “logs” and I made flames from melted red and orange lollipops. A candy maker I am not!
Campfire cake
I can’t say the cake turned out as nicely as I would have liked from a visual perspective, but it tasted damn good.
Credit for all the photos goes to Julius Ding of Julius and James Photography. This was their FIRST Bar Mitzvah photo shoot, and they really did capture the essence of the celebration, rather than the staged photos of the family and Bar Mitzvah boy that we all too often see. This was a celebration in real life and I’m so glad Julius was there to capture the moment.
There is so much more to tell you about the day because it didn’t end with the brunch! But I think I’ll save those details for another post. I’m starting to get tired just thinking about it again. Phew!
Feel free to contact me if you have any questions or want to learn more about what I did and how I did or where I got my ideas from.
After watching Cooked on Netflix, I was inspired to make my own sourdough bread. After all, Michael Pollan swore it was the easiest thing in the world. All it takes is flour, water, and some wild yeast encouraged by the bacteria floating through the air in your house. Easy!
Not so.
My first attempt to make sourdough starter was an abysmal failure. The flour and water looked–and smelled–like glue, which I guess it was.
Then I showed up at work with a homemade sour cherry pie (that’s another post!) and started talking about baking with a colleague. Little did I know that she, too, had been inspired to attempt sourdough bread after watching Michael Pollan and she had met with some success. She offered to share some of her sourdough starter with me, pointed me to a website that had easy to follow instructions and then I was off to the races!
I had my doubts about the starter. It failed once again and I ended up with a loaf of glue. See specimen here:
Glue bread masquerading as sourdough bread
So I decided to persevere. For those who know me–and I mean, really know me, I am a relatively impatient person. So waiting for a sourdough starter to be ready, or waiting for bread to proof, are exercises in patience for me. And you can’t rush a good loaf of bread. I fed my starter again and decided to just watch it for about 24 hours. Sure enough it came back to life and started bubbling away, and almost “breathing”. That’s the best way I can describe it. It’s literally alive! When it had filled up the bowl, I decided it was show time.
I mixed the starter with flour and water and mixed it with the dough hook. I added a spoonful of kosher salt too. Some recipes tell you to knead the bread a lot and to do some of the kneading by hand to encourage the glutens to bind with each other. Other recipes say to be careful not to overdo it with the kneading because you don’t want to destroy the wild yeast in the starter that will give the bread that lovely bubbled centre. It’s really hard to know which recipe to follow and what measurements to use when you’re a beginner. This is when the internet is not your friend, but seems to be deliberately working against you to leave you second guessing which is the best recipe to follow.
In the end I found a pretty straightforward recipe at Cultures for Health. There’s even a nifty video that walks you through the recipe, but I decided to try it without watching the video. I think I might watch the video next time.
So here are the results:
Here’s the sourdough starter
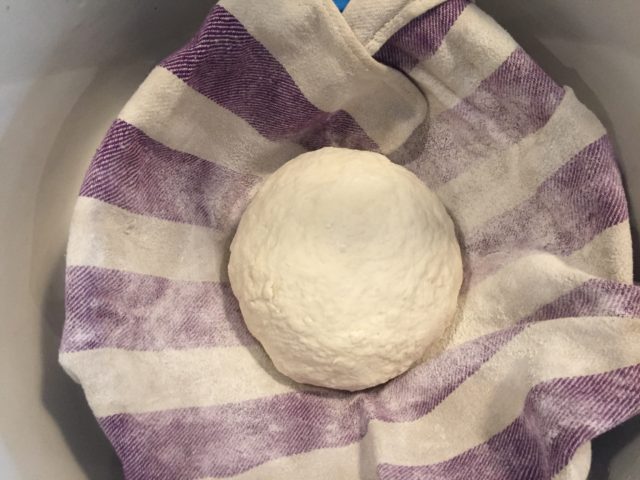
Here’s the dough in the proofing bowl
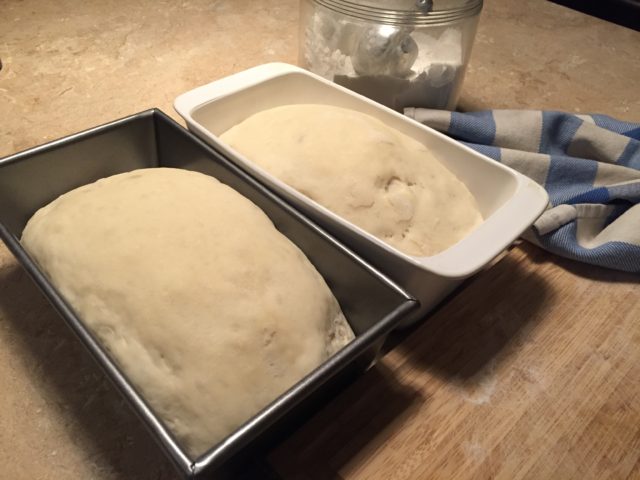
I made two loaves to proof (this may be where things went wrong)
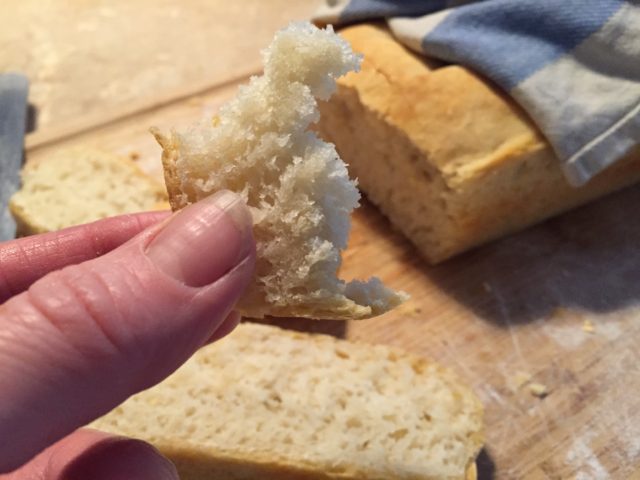
The inside of the bread was very dense
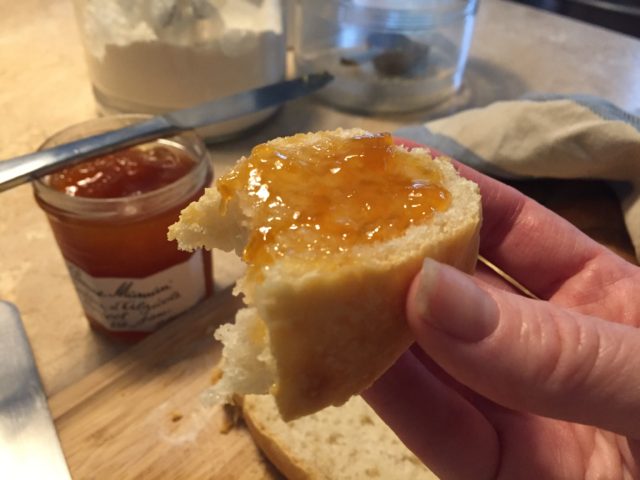
A slice of sourdough slathered with apricot jam
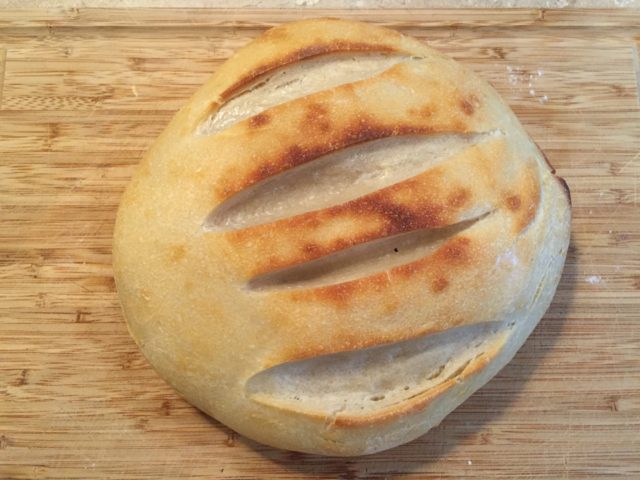
In the end the bread was quite tasty–crispy on the outside and nice and soft on the inside with some air bubbles that are indicative of sourdough bread. There is a nice tang to the flavour and the kids seemed to like it, which is a good thing. It didn’t puff up as much as it probably should have after proofing, which could mean one of two things: the sourdough starter wasn’t as mature as it should have been to help the bread rise, or else I didn’t leave it to proof long enough (12-ish hours???).
I can see why making bread is addictive. It’s not an exact science, and yet the success of your bread making depends entirely on science.
The sourdough starter is once again percolating away in the glass bowl on the counter and I look forward to my next attempt at making a loaf of sourdough. Let me know what the secret of your success is when making sourdough. I could use all the help I can get!
Last year my birthday fell on a Monday. It was the first day of a new job and I felt I couldn’t ask for the day off and really celebrate it the way I wanted to. I didn’t feel like telling my new colleagues, who were complete strangers to me. But I do remember buying myself a below average slice of red velvet cake at the coffee shop in the lobby of my building on my lunch break to mark the occasion.
I couldn’t even celebrate that night with my family because we were busy taking the kids to hockey games. It shouldn’t have bothered me because I was planning on celebrating that milestone birthday when the weather improved. Nevertheless the day was a bit of a disappointment and I vowed then that I would not let another birthday pass without marking the day in a special way.
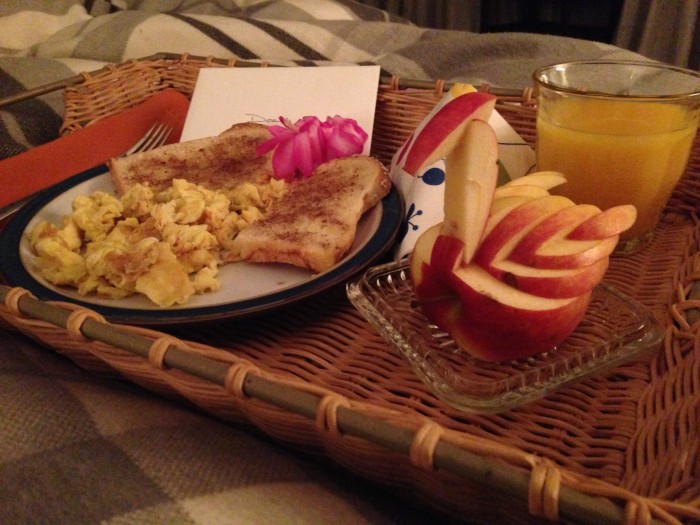
Today began with breakfast in bed from my wonderful husband. Check out the apple swan he carved up! What he didn’t know was that I already had plans for breakfast with my Mom so the kids tucked into the cinnamon toast and scrambled eggs.
Breakfast in Bed
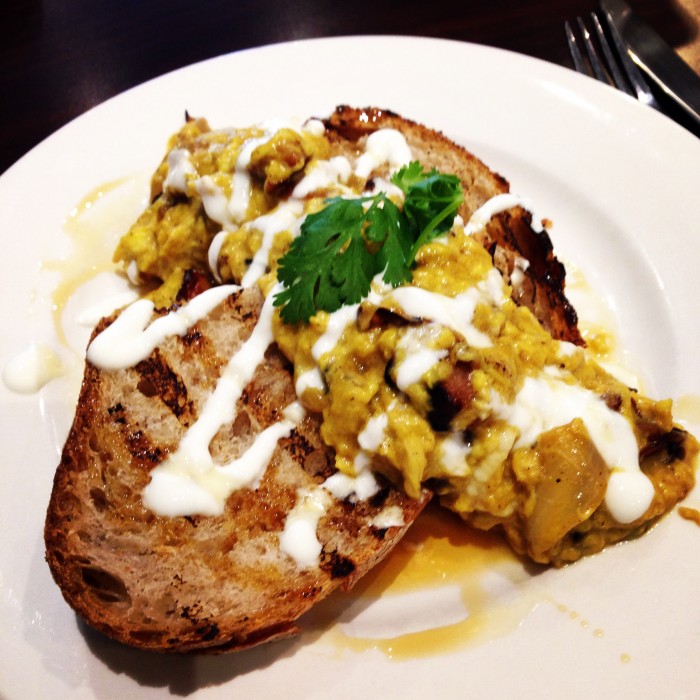
We headed over to Scratch Kitchen for breaky. I had this amazing dish called Soft Scrambled, which was full of sweet caramelized onions, pulled pork and other stuff I can’t remember on top of homemade rustic bread. Yum!
Soft Scrambled from Scratch Kitchen
After breakfast we headed over to Costco (yeah, I know, not exactly the most exciting birthday destination) to do some shopping for food and other essentials. $325 later we bounced and hit the mall for a bit of retail therapy. The post-holiday sales were great, but most stuff was picked over so the choices were limited. I ended up getting a cute unstructured blazer from Maison Scotch for 70% off! Score!
Things picked up in the afternoon with a visit from my massage therapist who pummelled my leg muscles into submission. I thought I was going to barf it hurt so much. I have since learned there is a term for this sensation–it’s called an “autonomic response.” Apparently this is a good thing and means I am more in tune with my body. Not sure I need to feel everything to the point of being nauseated.
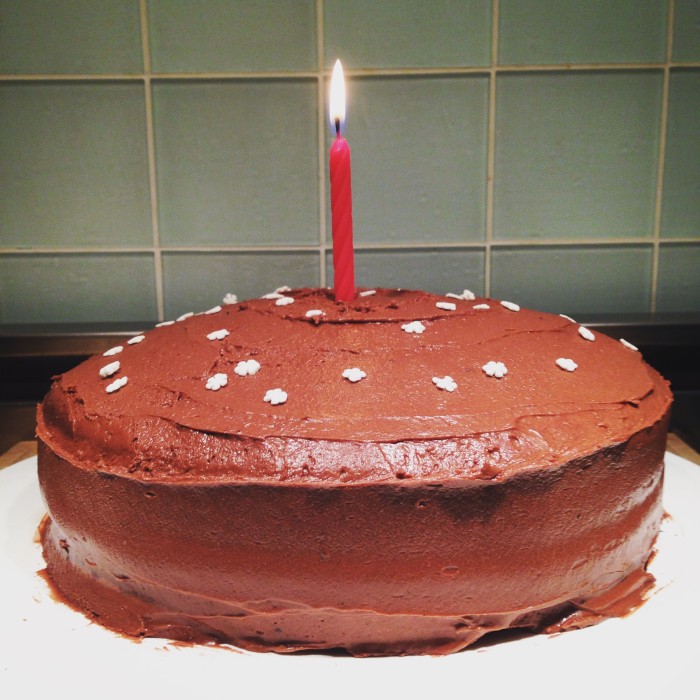
I whipped up a chocolate cake really quickly. I know what you’re thinking: “You mean you baked your own birthday cake? How depressing.” Not at all! I love to bake and it was cake in a box with homemade icing. Super easy. Super quick. Always a crowd pleaser. And pretty!
Chocolate Birthday Cake
Dinner with the fam came next. It was perfect: Chinese buffet so the kids didn’t have to wait and order off a menu and they could pick what they wanted.
The night ended with a soak in the bath tub and the Downton Abbey Christmas Special.
It really was a great day. And that’s the point–it was great for me. I still think celebrating any birthday, milestone or not, is about more than the day itself. It’s about looking back and reflecting on how I grew and changed as a person over the last twelve months and what I managed to accomplish. It’s also an opportunity to look ahead to the next twelve months and set some goals. I’ve signed up for a half marathon. I want to take courses on photography and Photoshop and I’m chomping at the bit for another design project.
If this is what they call middle age, it feels pretty good to me.
Call me a glutton for punishment, but every year for the last–oh, I don’t know–four years, my husband and I have hosted a Hanukkah party for our closest neighbourhood friends. You see, we are the token Hebrews in the ‘hood, so most of our friends have never been to a Hanukkah party, let alone tasted a latke. So, we felt it would be a Mitzvah (aka: good deed) on our part if we threw a little shindig to enlighten our friends.
Well that little shindig turned into a big shindig and has become something of a tradition. It has also given me licence to go a bit meshugenah (crazy) with the event planning, decor and yes, a dessert table!
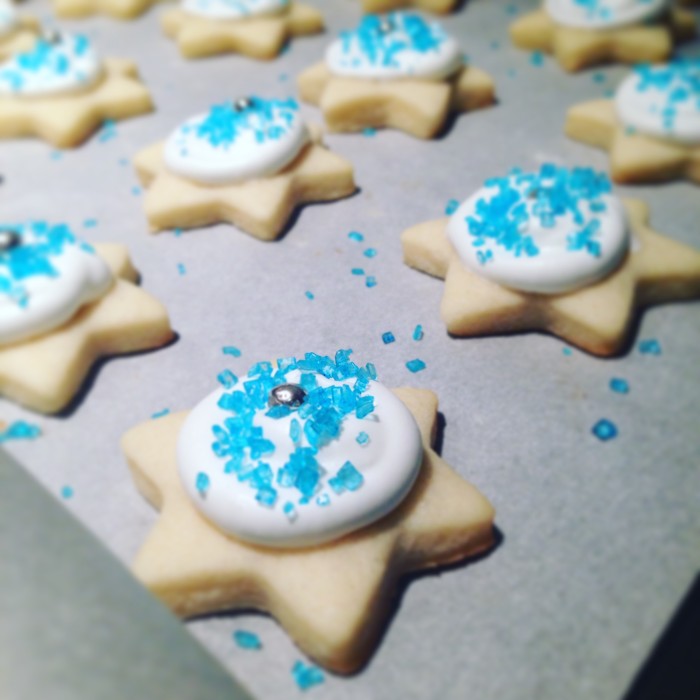
Today I’m giving you a preview of some of my *crazy* ideas. I made a big batch of sugar cookies a la Martha Stewart and decorated them with royal icing and some confectioners’ decorative sugar. You will notice a theme of blue, white and silver.Â
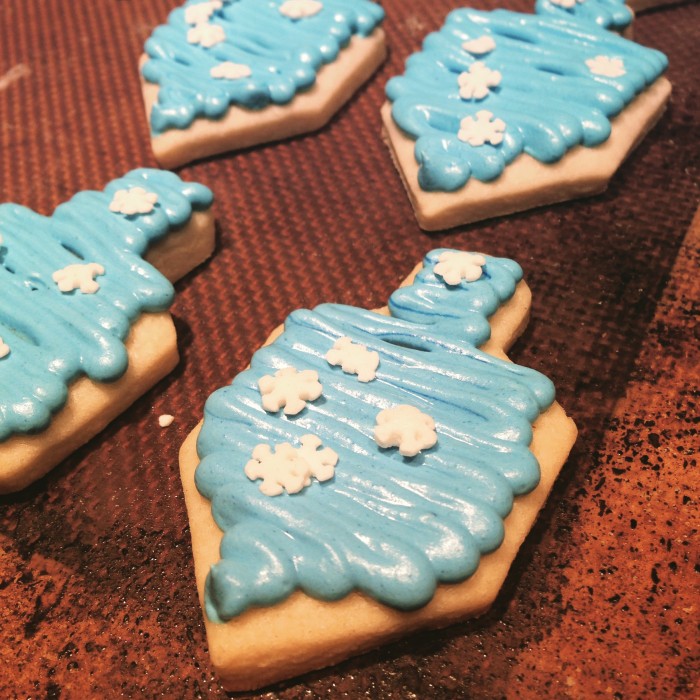
I made the dough, chilled it, rolled it out, cut it into the shapes of dreidels, menorahs and stars of David before baking. Then I went to town on the icing. The icing was a piping consistency and I could have piped all the cookies and then flooded them, but I got lazy. So the icing is a little thicker (the kids will love me for it–not the parents) than usual and maybe not as pretty. But I’ll let you be the judge!
Fresh baked star of David sugar cookies
Star of David sugar cookies with royal icing, blue confectioner’s sugar and a silver dragee.
Dreidel sugar cookies with blue royal icing and white snowflakes
So I went on a cookie making bender last night. And there was a legitimate reason. We are in the midst of a United Way fundraiser at the office, so I thought I’d do my part. We decided to encourage people to make a pledge or donation by enticing them with homemade baking when the munchies hit around 3 in the afternoon. It worked like a charm and here are the results!
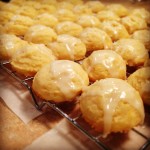
Lemon Drop Shortbreads
Display of cookies–these have fresh baked chocolate chip cookies too!
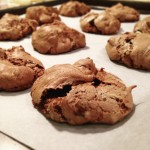
Chocolate walnut meringues
I feel like this was my warm up act to the big baking contest next week…the meringues were incredibly popular so maybe I’ll try those again. What do you think???